Getting started
From download to your first conversation. You will need an account with an AI provider: the app has no AI of its own, so which AI you use and what it costs is your choice. Setting up takes about ten minutes; building a good character takes as long as you like, and every field is explained below.
1. Install the app
Pick your platform in the download section and follow the note on its card: Windows may warn about an unknown publisher, Android asks you to allow installs from your browser, and on Linux the AppImage needs to be allowed to run. You can check the file before you install it.
On first launch, Android asks whether the app may send notifications. Allow it if you want characters to be able to text you. Then read the license and privacy policy, tick both boxes and press Proceed.
If you see Open Beta is live!, that is the offer of a free update key on Discord. The app works without one; press Later to carry on.
2. Get an API key
The app talks to the AI through a provider you have an account with. If you are new to this, start with OpenRouter or NanoGPT: one key reaches models from many companies, including the one the memory features need.
Create an account on the provider's website and make an API key there. Most models cost a little per message, so you may need to add some credit first. Keep the key private: anyone who has it can spend your credit.
Already using Gemini, OpenAI, Anthropic or xAI? Their keys work too. To run a model on your own computer instead, the app connects to Ollama, KoboldCpp and LM Studio under Settings → Local AI.
3. Paste your key
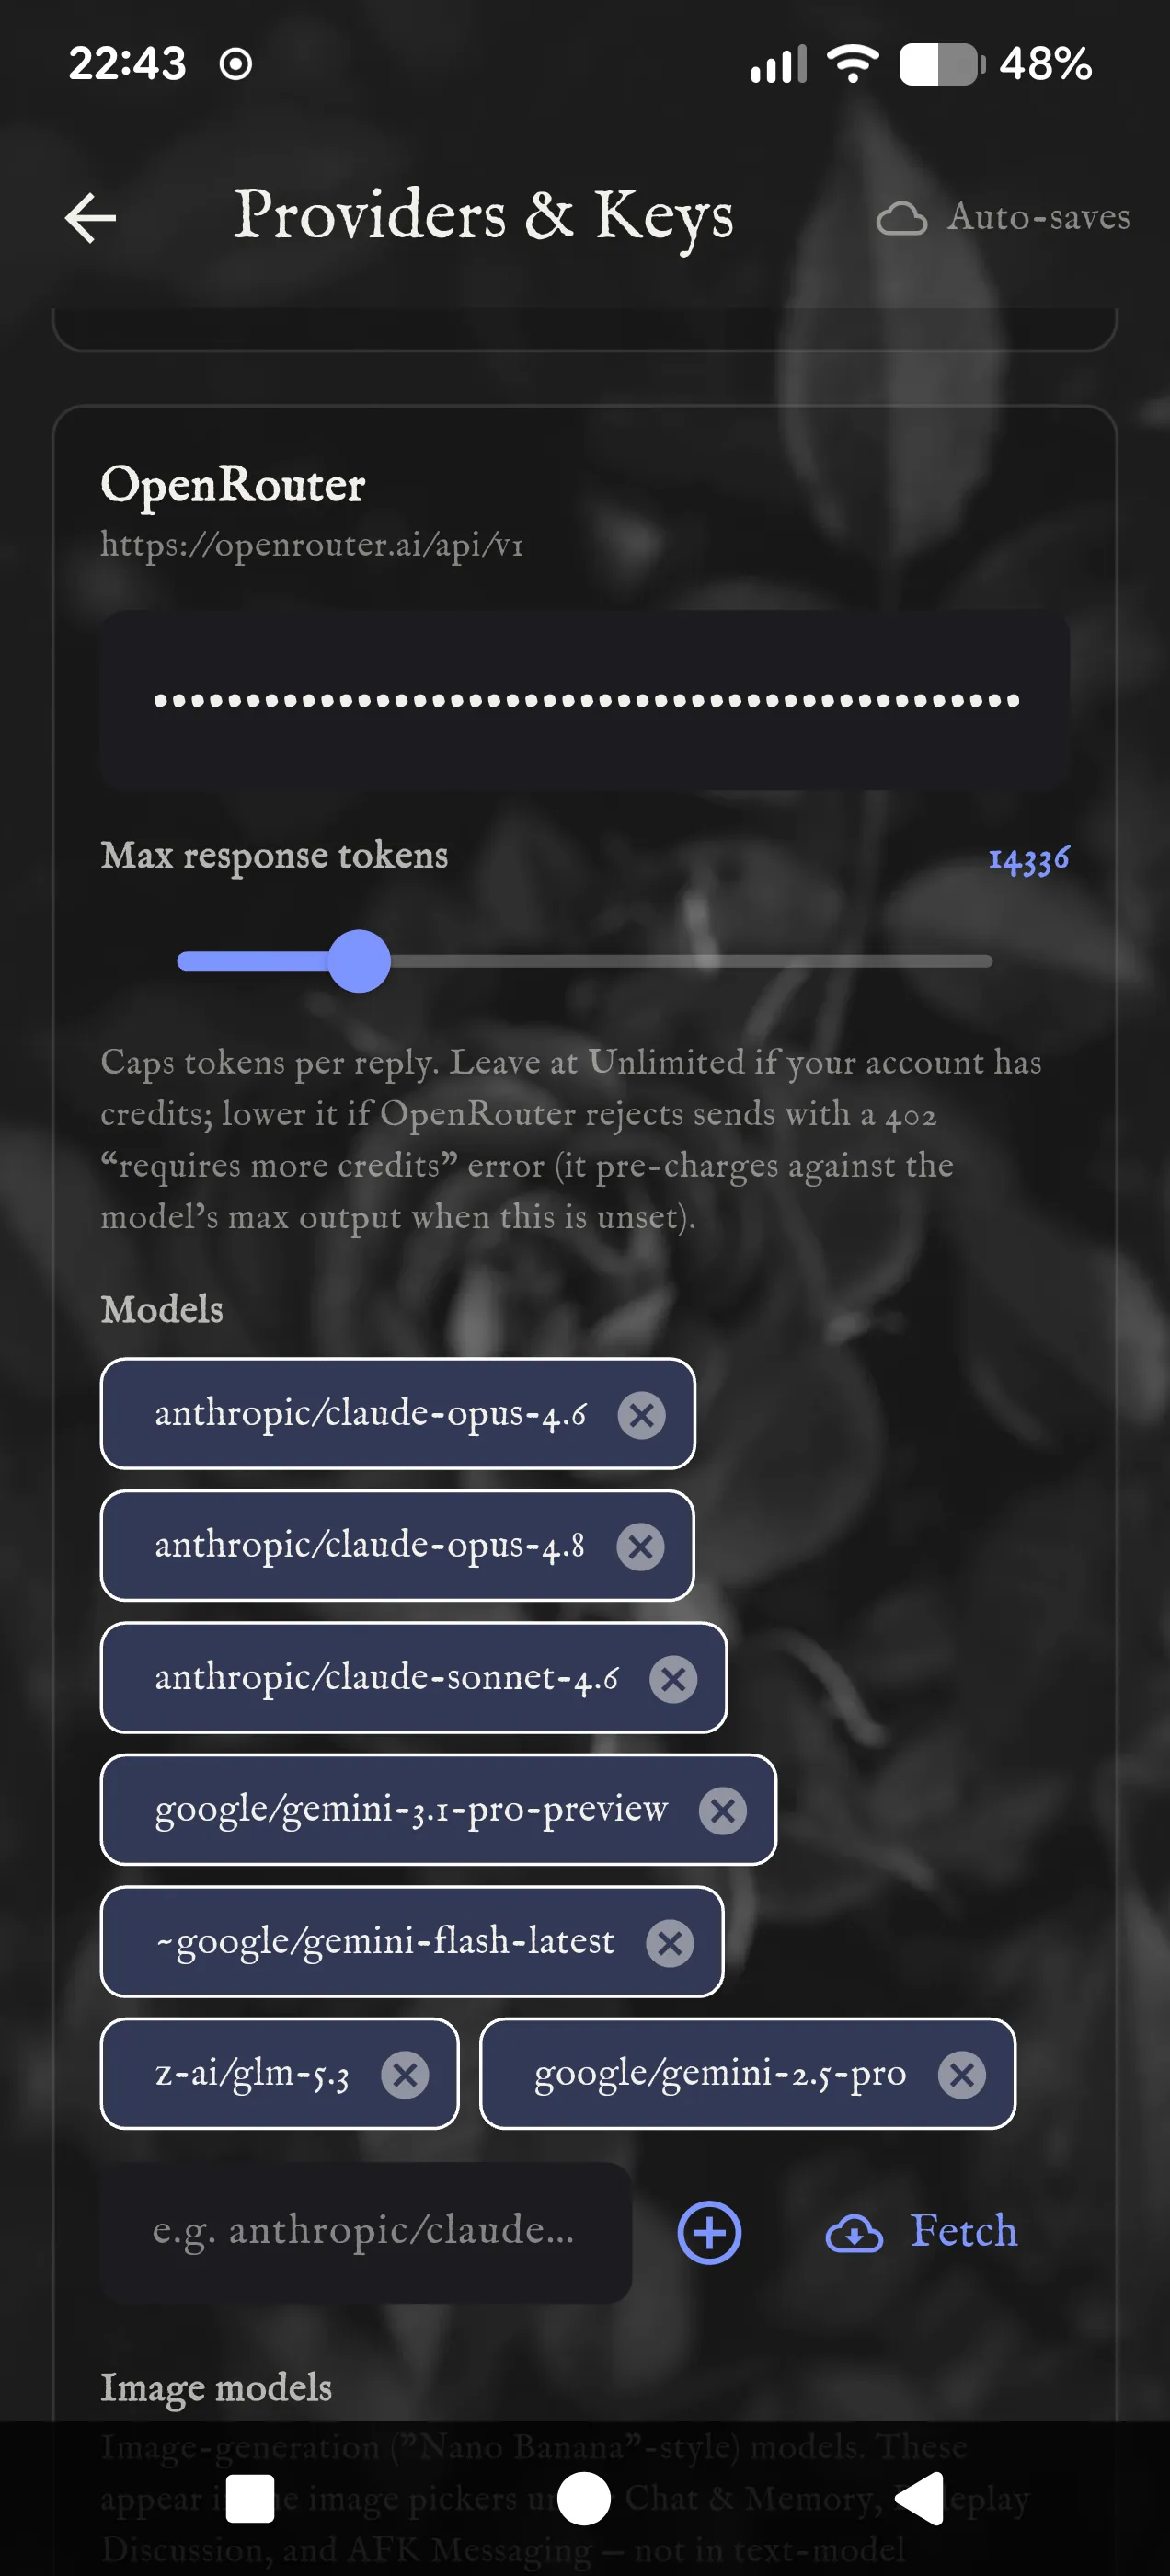
Open Settings with the gear in the top right corner, then Providers & Keys under Providers & Models. The page saves as you go.
- Scroll down to your provider's card, for example OpenRouter, and paste the key into the empty field under its name. The key shows as dots once it is in.
- Under Models, press Fetch to load the models the provider offers, or type a model's id and press +. The models you add here show up in every model picker in the app, written as "Provider · model".
Max response tokens caps how long a single reply can be. Leave it at Unlimited unless your provider complains that you don't have enough credit for a reply.
4. Point every job at your provider
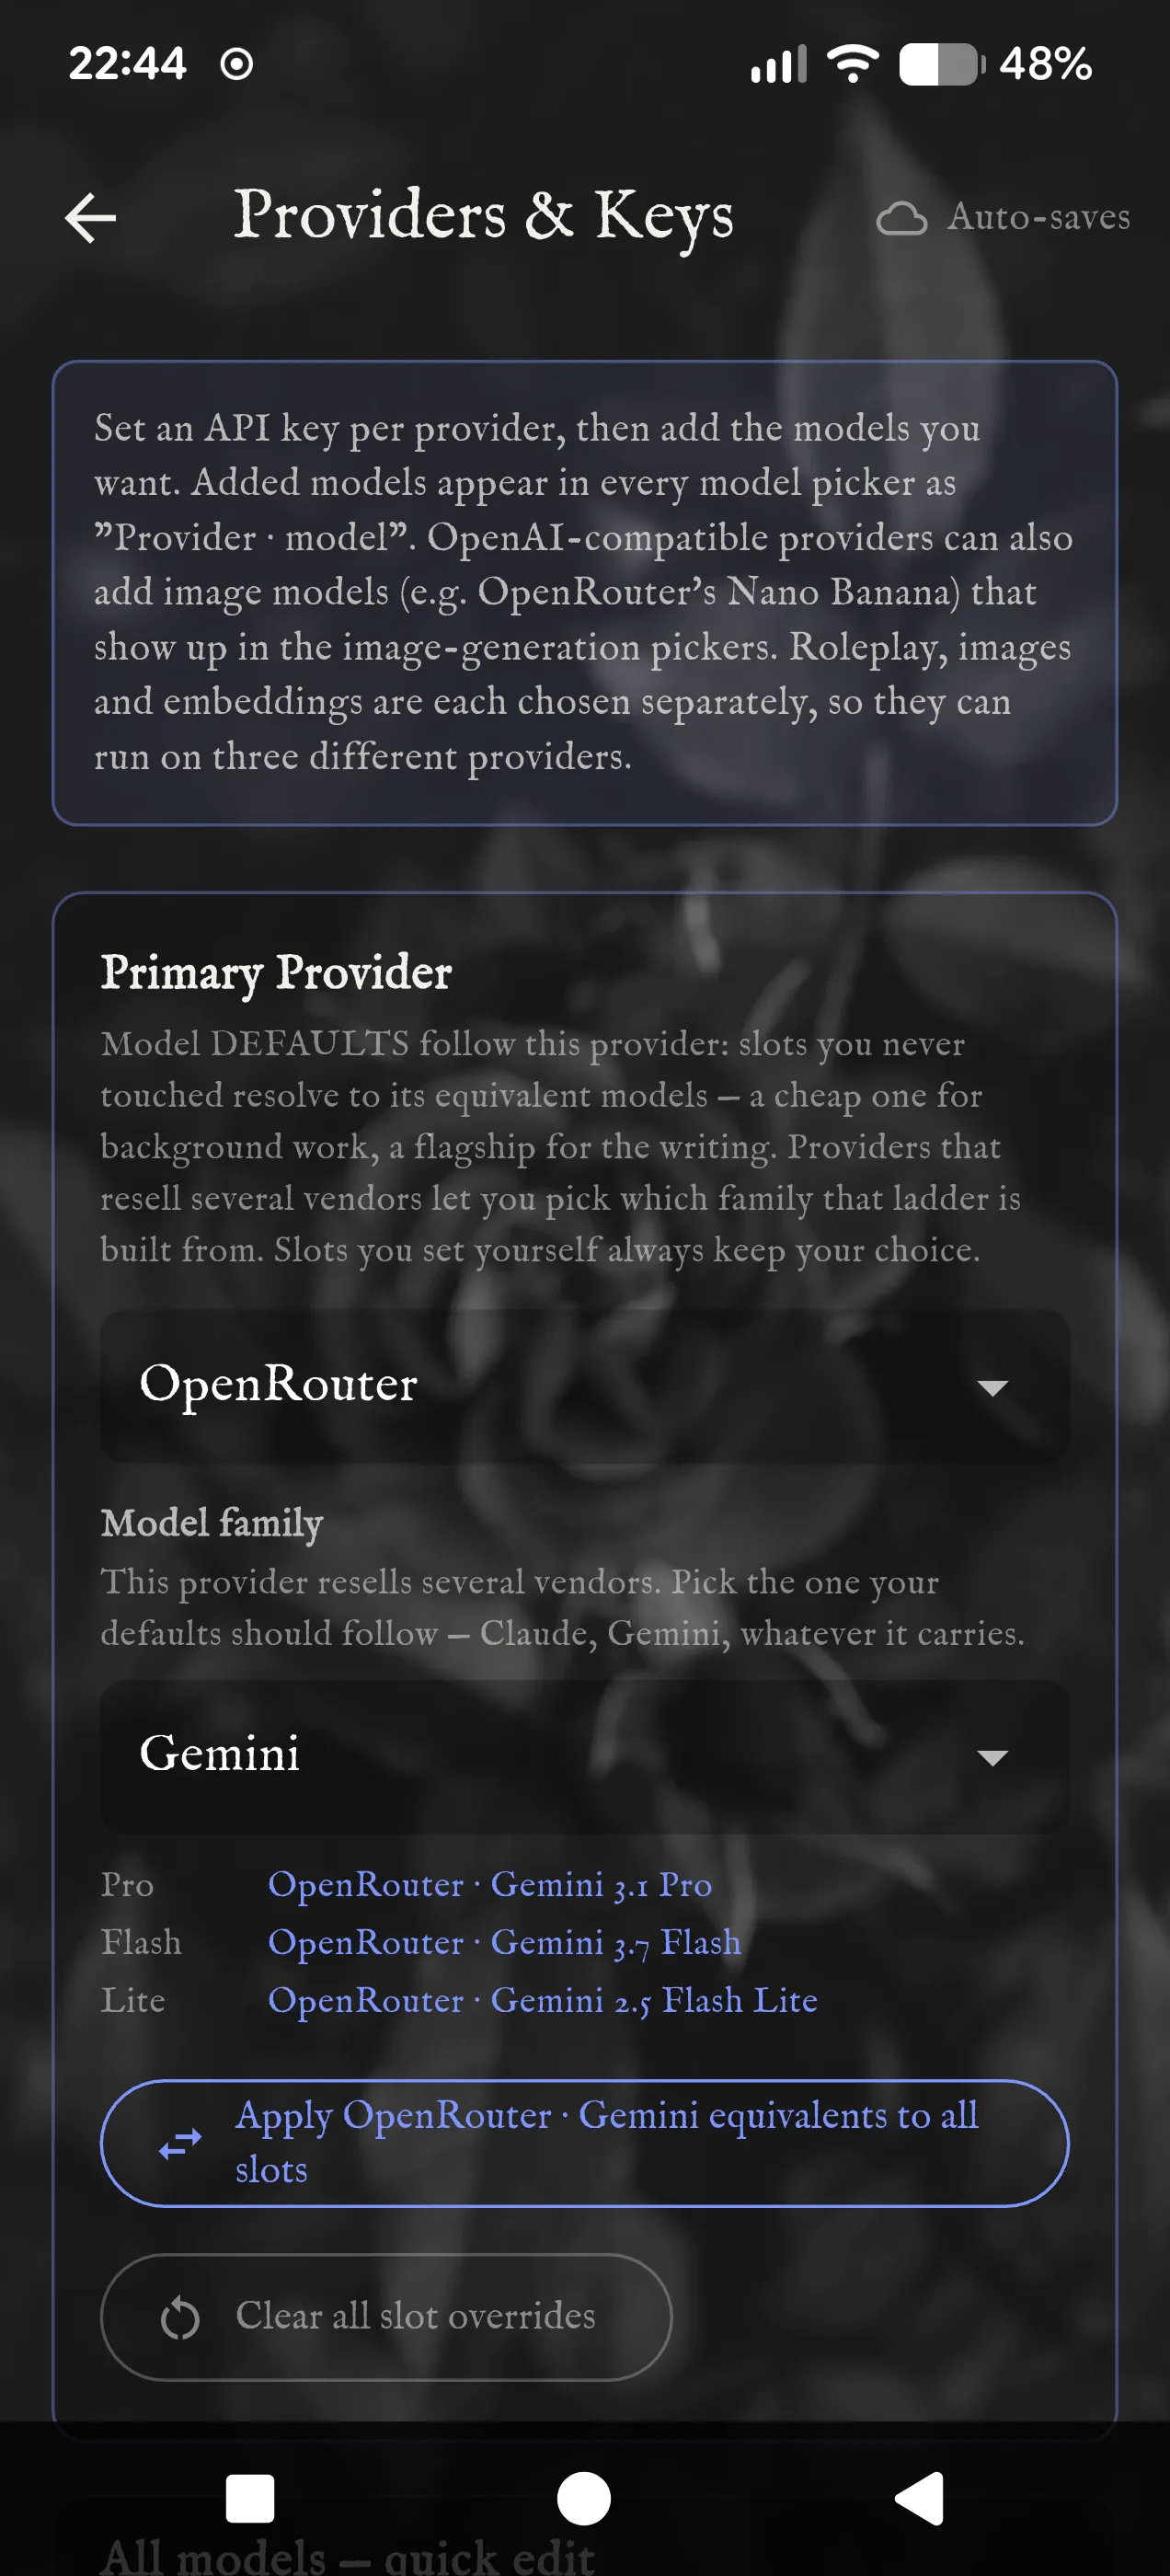
This step is the one people miss, and the app won't work properly without it.
The app does many jobs with AI, not just writing replies: scoring what matters in a conversation, building the character's memory, running the Narrator, planning stories. Each job has its own model, and out of the box every one of them is a Gemini model called straight from Google. If your key is from OpenRouter or NanoGPT, those jobs would keep knocking on Google's door with no key and fail, even when the model you want is Gemini.
At the top of Providers & Keys, in the Primary Provider box:
- Open the dropdown and choose your provider by name, for example OpenRouter. Don't leave it on Auto.
- If your provider sells models from several companies, a Model family dropdown appears: Claude, Gemini, GPT, Grok and so on. The app builds its set of models from that family: a strong Pro model for the writing, a Flash model for everyday work, and a cheap Lite model for background jobs, listed under the dropdown. Families differ a lot in price and in how they write. If you are not sure, start with Gemini.
- Press Apply OpenRouter · Gemini equivalents to all slots (the button names your own choice). Every job now uses the matching model from your provider.
Do it again whenever you change provider or family. Clear all slot overrides undoes any model you picked by hand for a single job.
5. Turn on memory
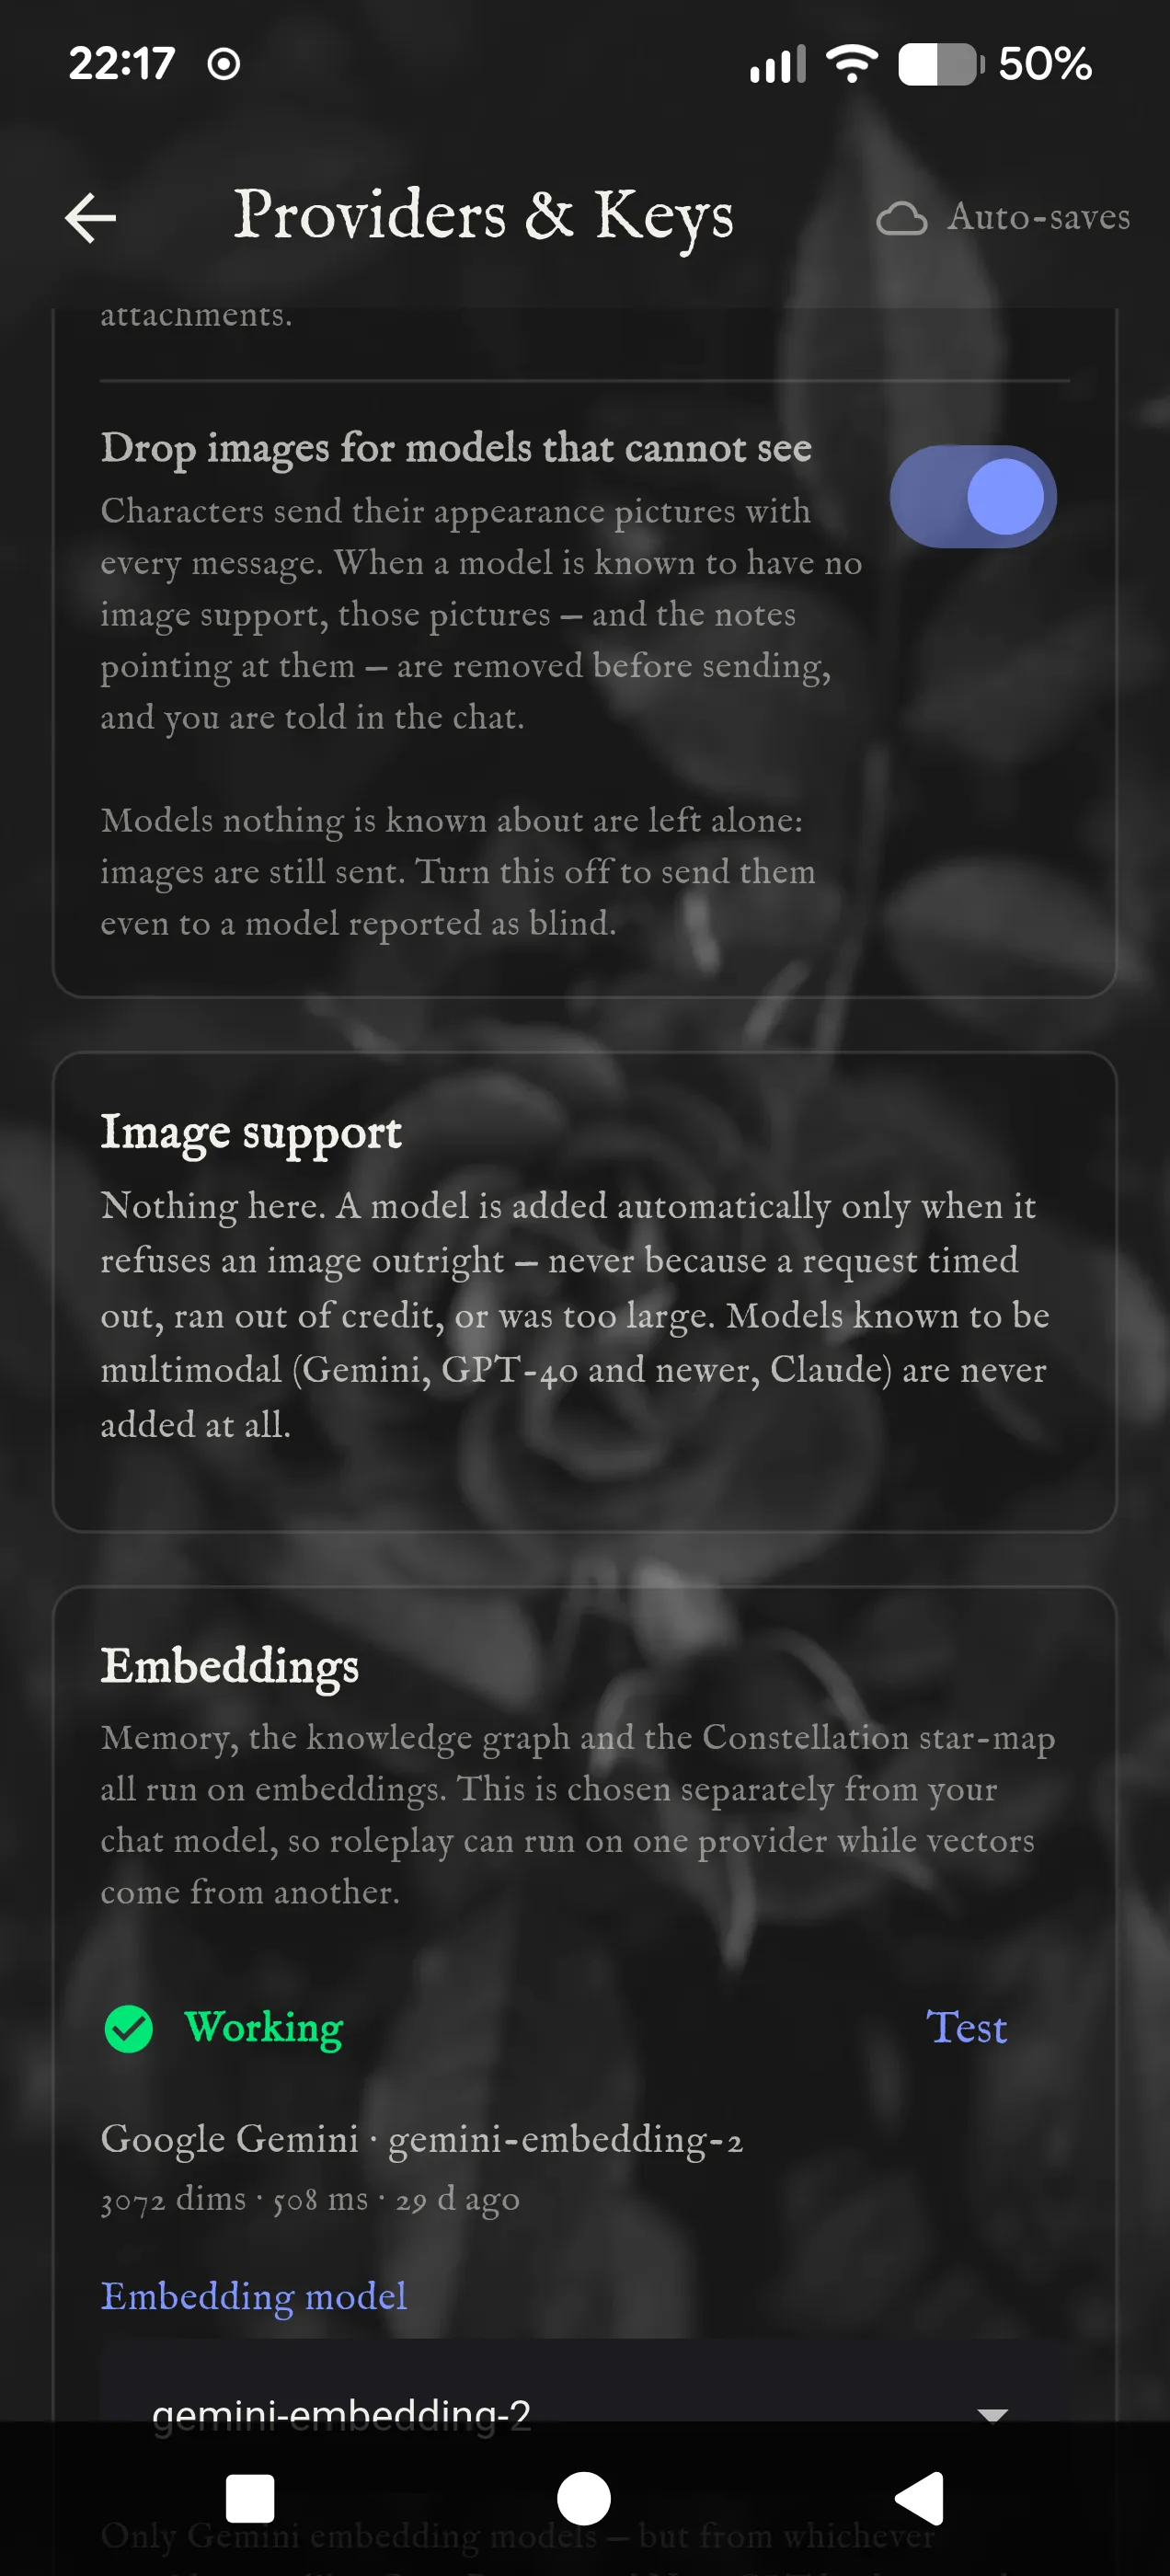
Memory, the knowledge graph and lore retrieval all run on a Gemini embedding model: a model that turns text into something the app can search by meaning. It is set separately, lower on the same page, in the Embeddings card.
- Under Add one from a provider, pick OpenRouter or NanoGPT and press Fetch to find the Gemini embedding model, or type its id (on OpenRouter,
google/gemini-embedding-2). - Press Add, then choose it under Embedding model.
- Press Test. When the card says Working, memory is ready.
With a Google key you can use Gemini's own embedding model instead. Skip this step and chat still works, but characters remember far less, lorebooks can't be searched, and the app will warn you.
6. Three ways to get a character
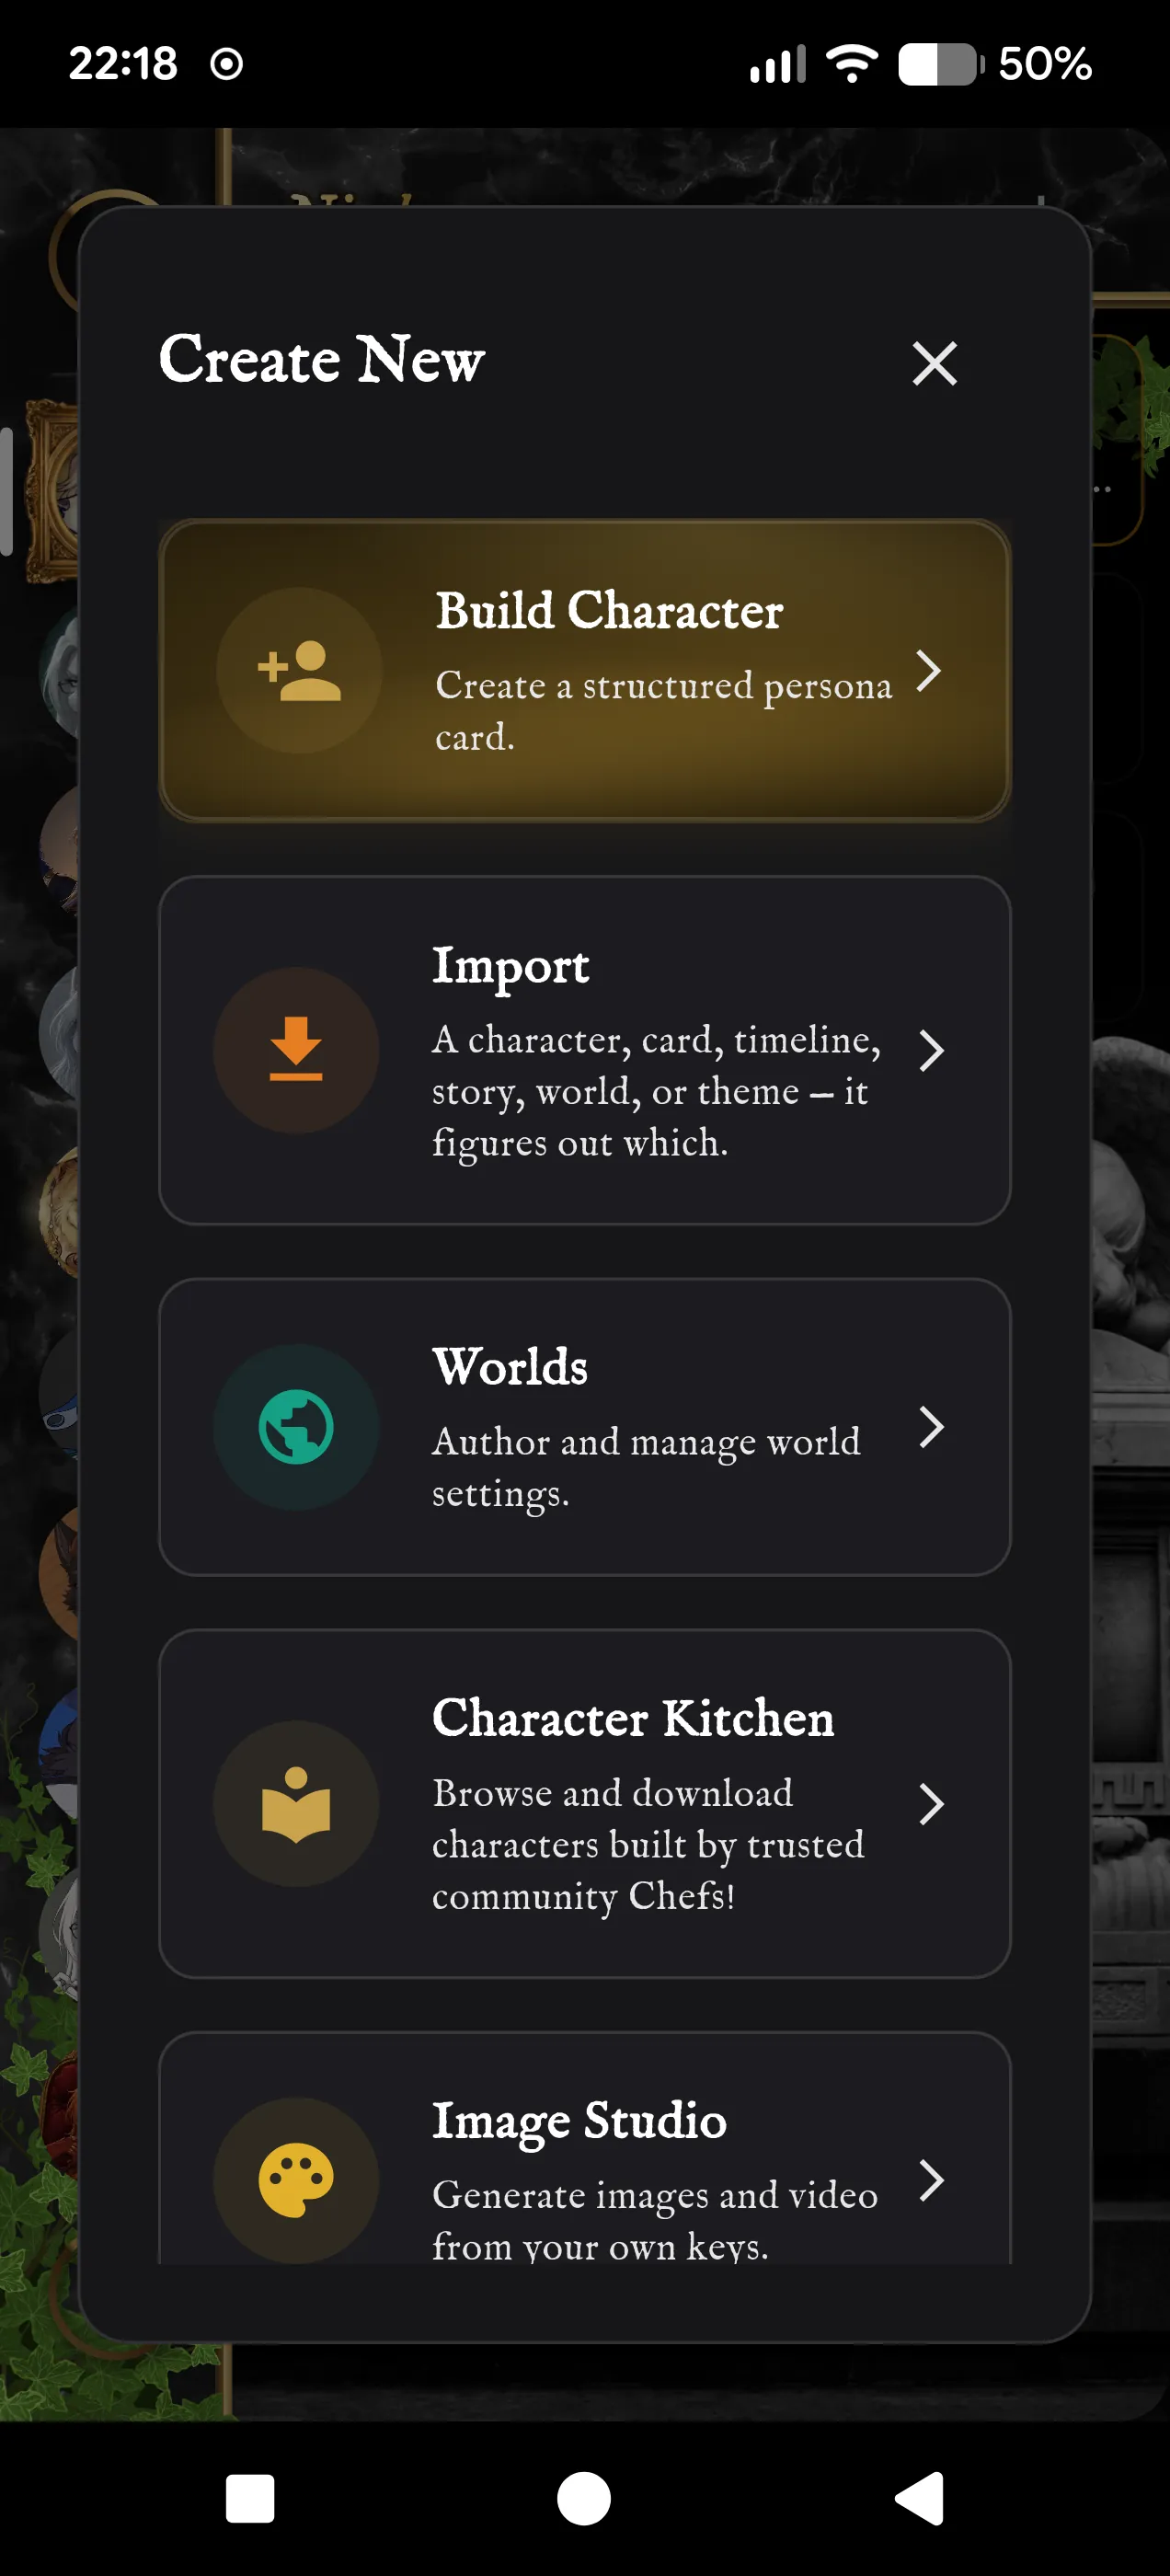
Open the character list (swipe from the left, or tap the top left corner) and press the + at the top of the rail. Create New gives you three ways in:
- Build Character to make one yourself. The next steps go through every field, using Ankhesenamun, an elder dragon who teaches at a college for magical beings, as the example.
- Import to bring in a character you already have, including SillyTavern character cards (PNG or JSON). The AI rewrites the card into the app's own fields, so this uses your key.
- Character Kitchen to download a character someone else made. It opens in the editor; save it to keep it.
Only Name is required. Everything else makes the character better, and each field has a (?) that explains it in the app too.
7. Pictures and Lazy Mode
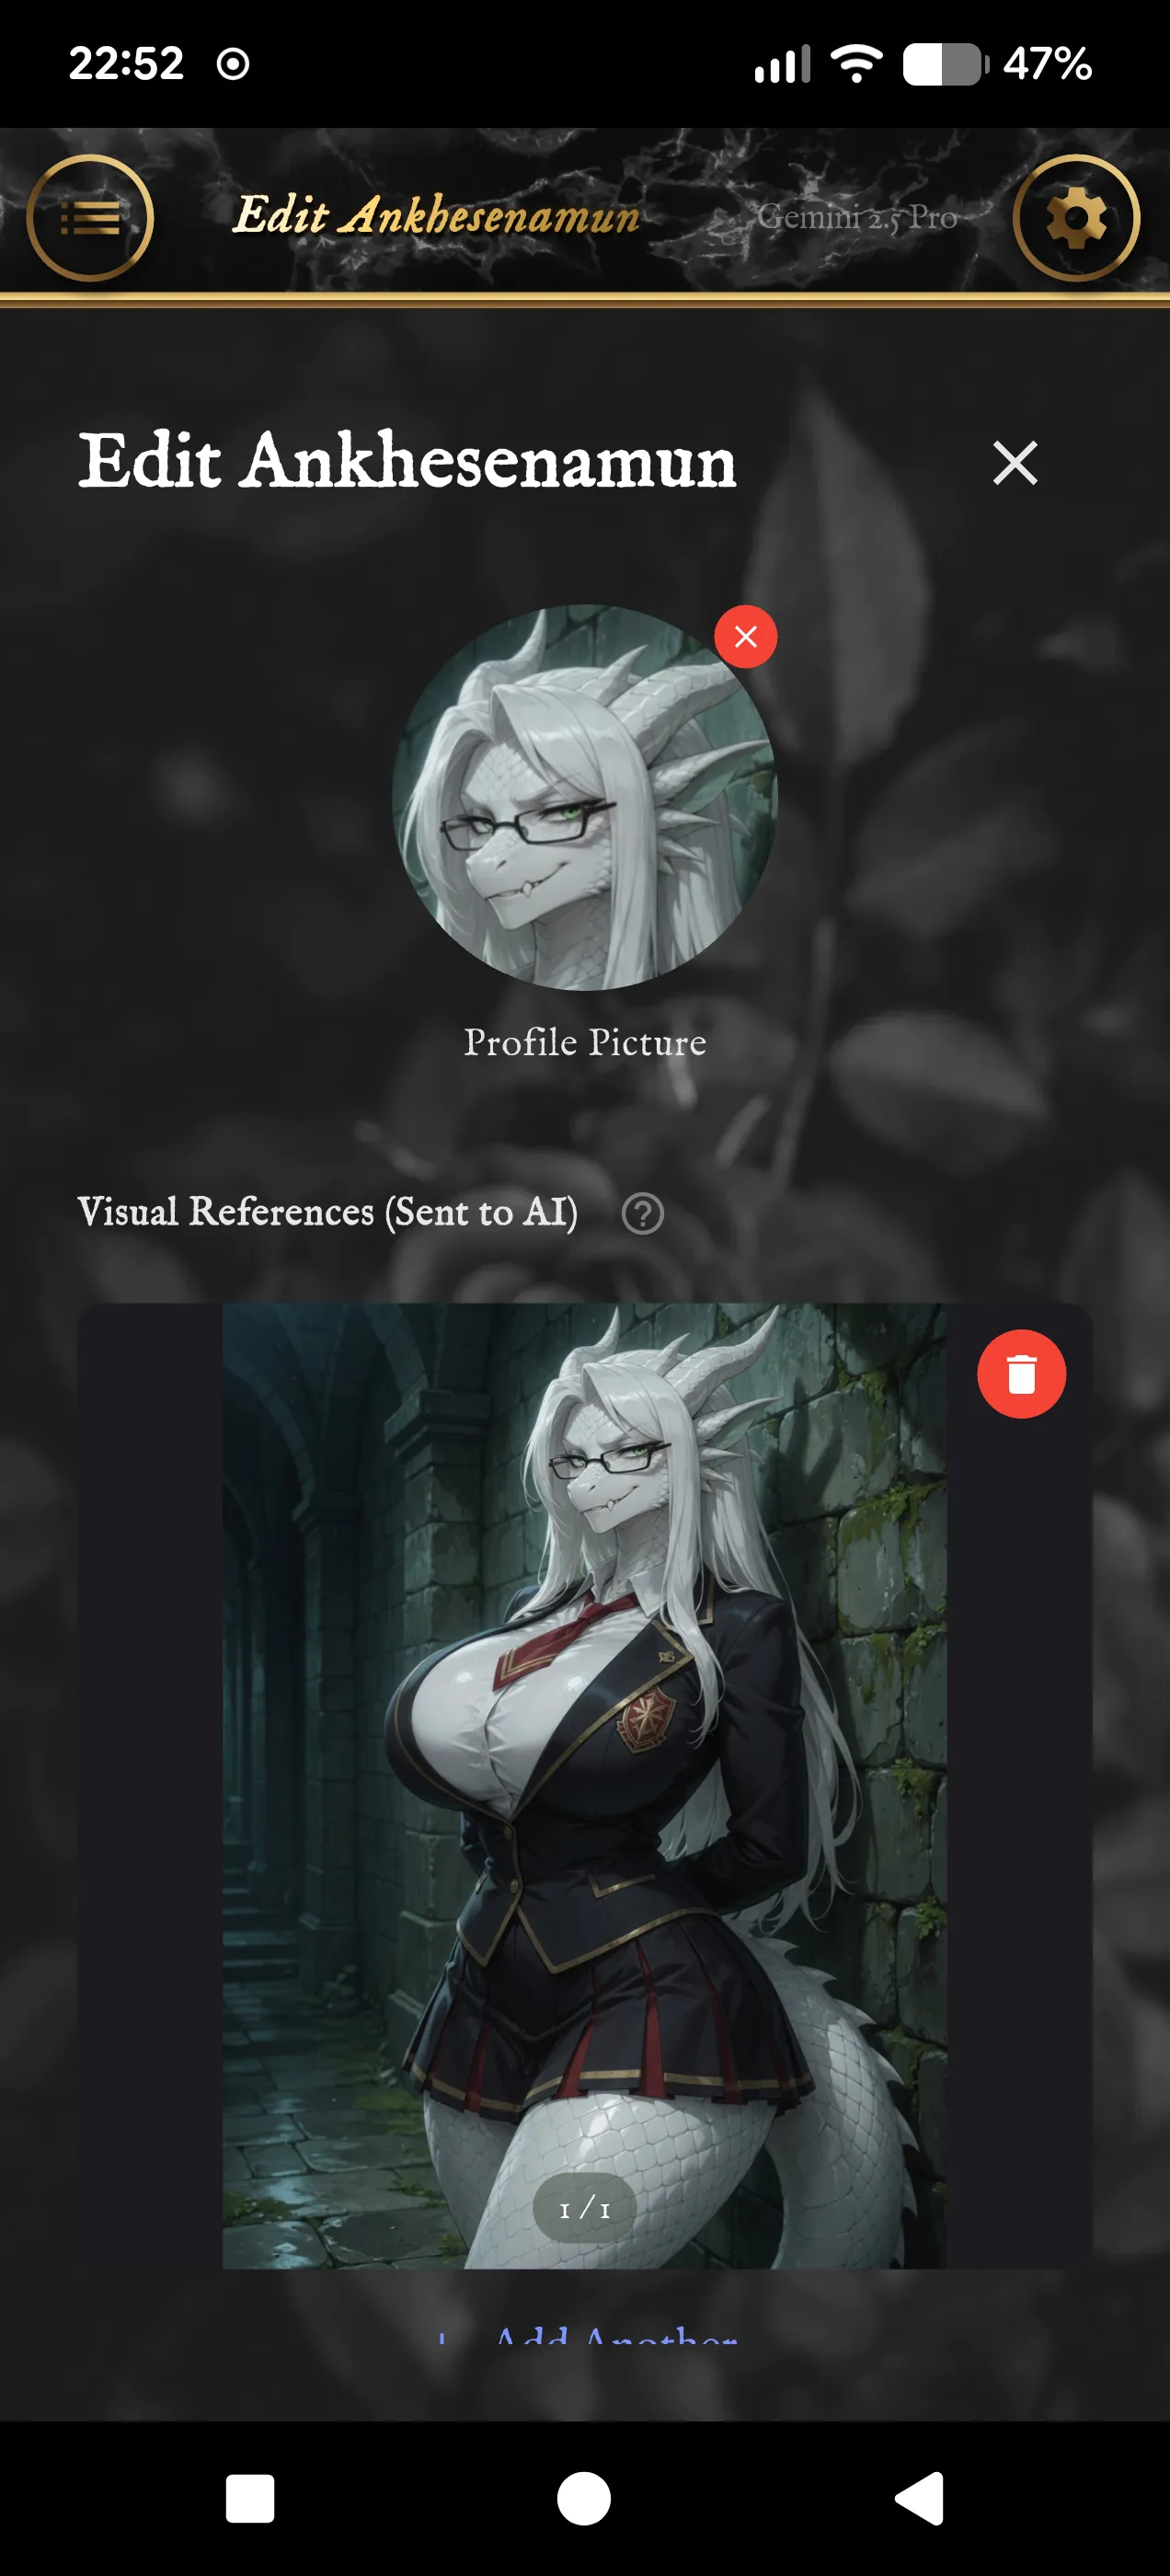
Profile Picture is the round portrait on the rail and in the chat. It is only used inside the app and is never sent to the AI.
Visual References (Sent to AI) are pictures of what the character looks like. Add one or more with Add Visual Ref. They are sent at the start of every conversation so the character stays consistent about their looks, and the picture tools use them to know who they are drawing. They go to your AI provider with your messages, so only add pictures you are fine sending.
I'm lazy, make the character for me (Lazy Mode) reads your references and writes the character for you. It offers you four ideas to pick from, then fills in the fields that are still empty; anything you already wrote stays. It needs at least one reference picture. If the character belongs to a World, it builds someone who fits there.
8. Name, personality and appearance
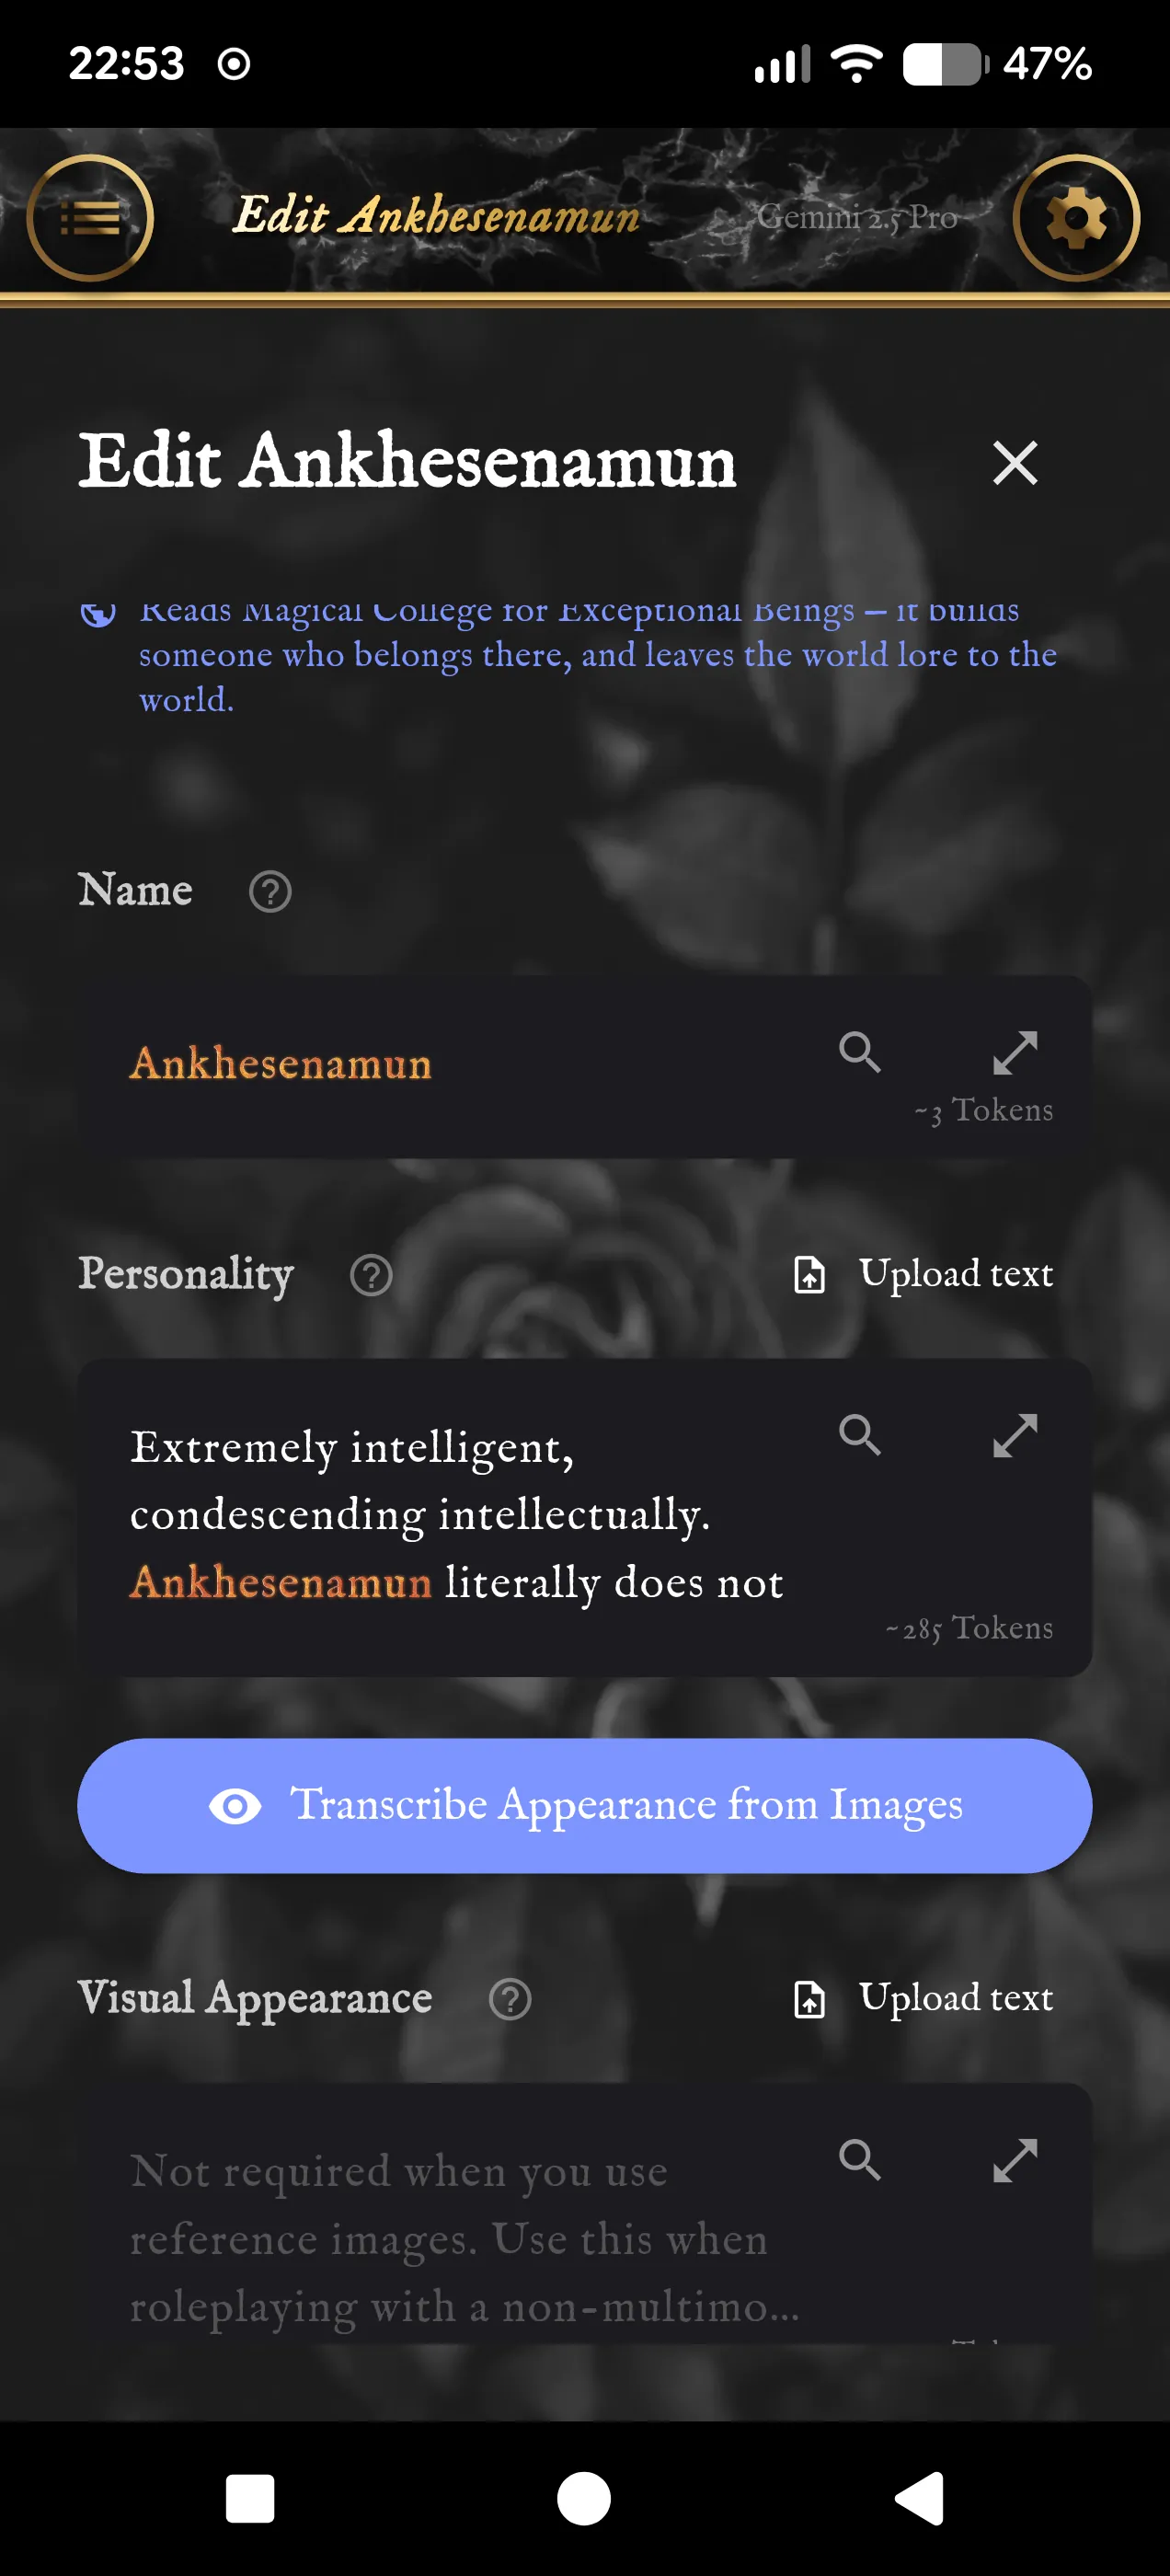
Name is what the character answers to everywhere: in chats, in memory, in notifications.
Personality is the biggest part of how the character feels. It is sent with every message. Write how they think, how they talk, their habits, what they value and what gets under their skin. "Extremely intelligent, condescending intellectually, does not suffer fools" tells the AI more than "smart and mean". You can refer to yourself as {{userName}} and to the character as {{personaName}} (or {{user}} and {{char}}), and the app fills in the names.
Visual Appearance describes their looks in words. You can leave it empty when you added reference pictures and your model can see images. If your model can't, write the appearance here, or press Transcribe Appearance from Images to have it written from the pictures. It adds to what is already there and never replaces it.
Upload text, next to many fields, adds the contents of a .txt or .md file to the end of that field.
9. Abilities, world and lore
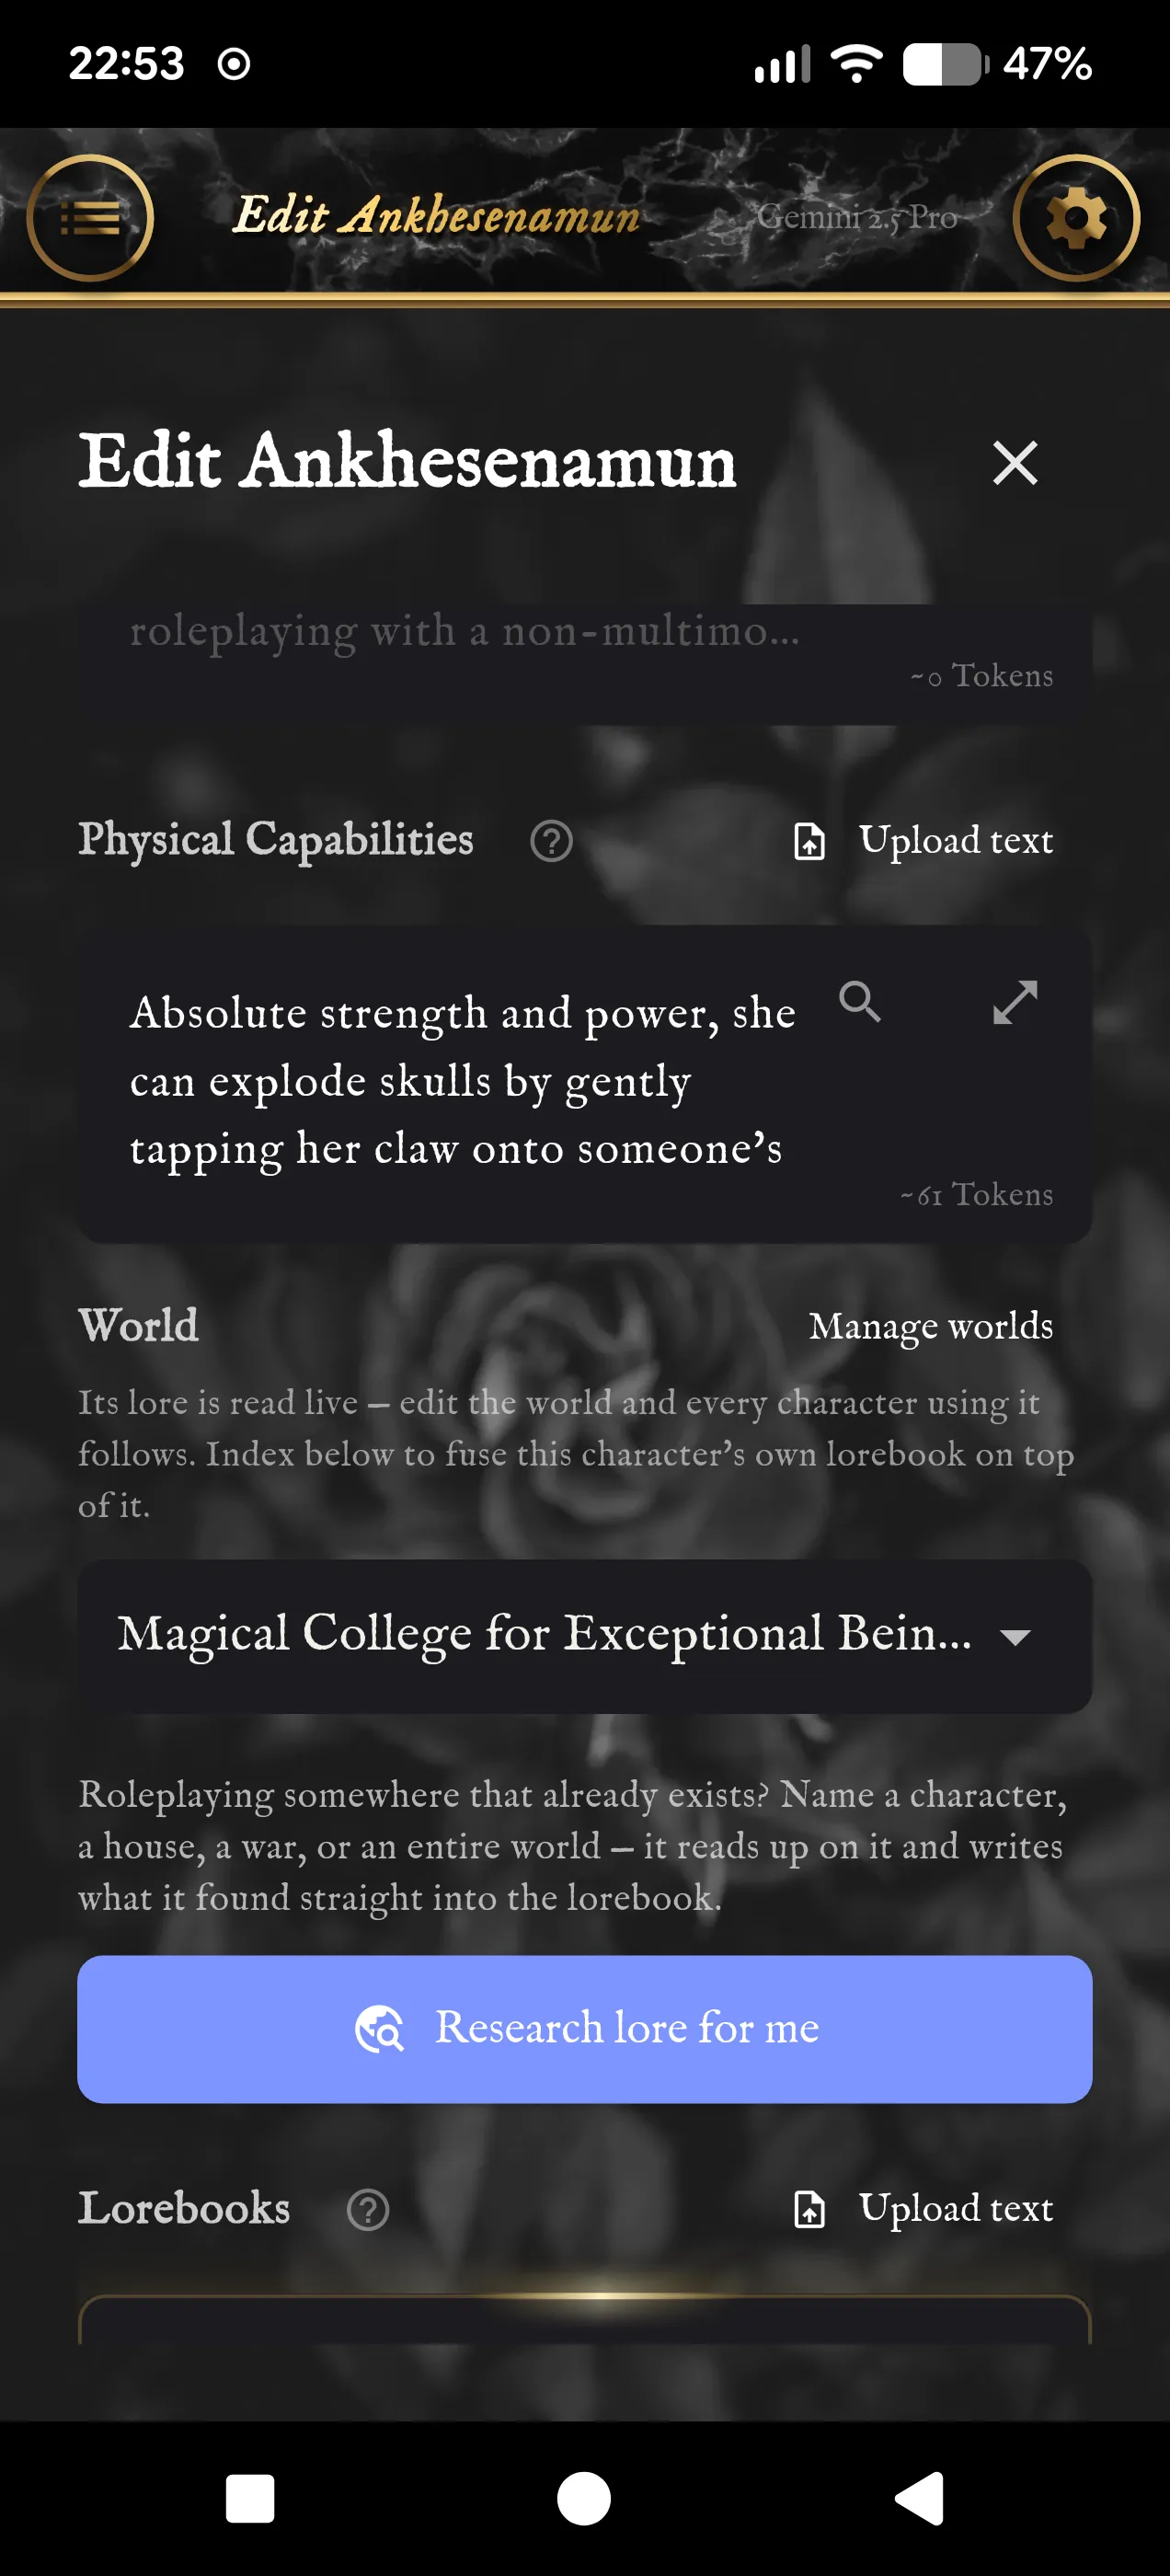
Physical Capabilities lists what the character can and can't do with their body: strength, limits, powers. It keeps the AI consistent in fights and physical scenes. Ankhesenamun's says she can shatter a skull with a tap of her claw.
World attaches a world you built under Worlds in the Create New menu: its lore, its places and its cast of side characters. The world's lore is read live, so editing the world updates every character in it. Ankhesenamun belongs to Magical College for Exceptional Beings, so her own lore only needs what is special about her.
Research lore for me is for characters from something that already exists: name a character, a house, a war or a whole world, and it looks it up and writes what it found into the Lorebook.
10. Lorebooks and Static Lore
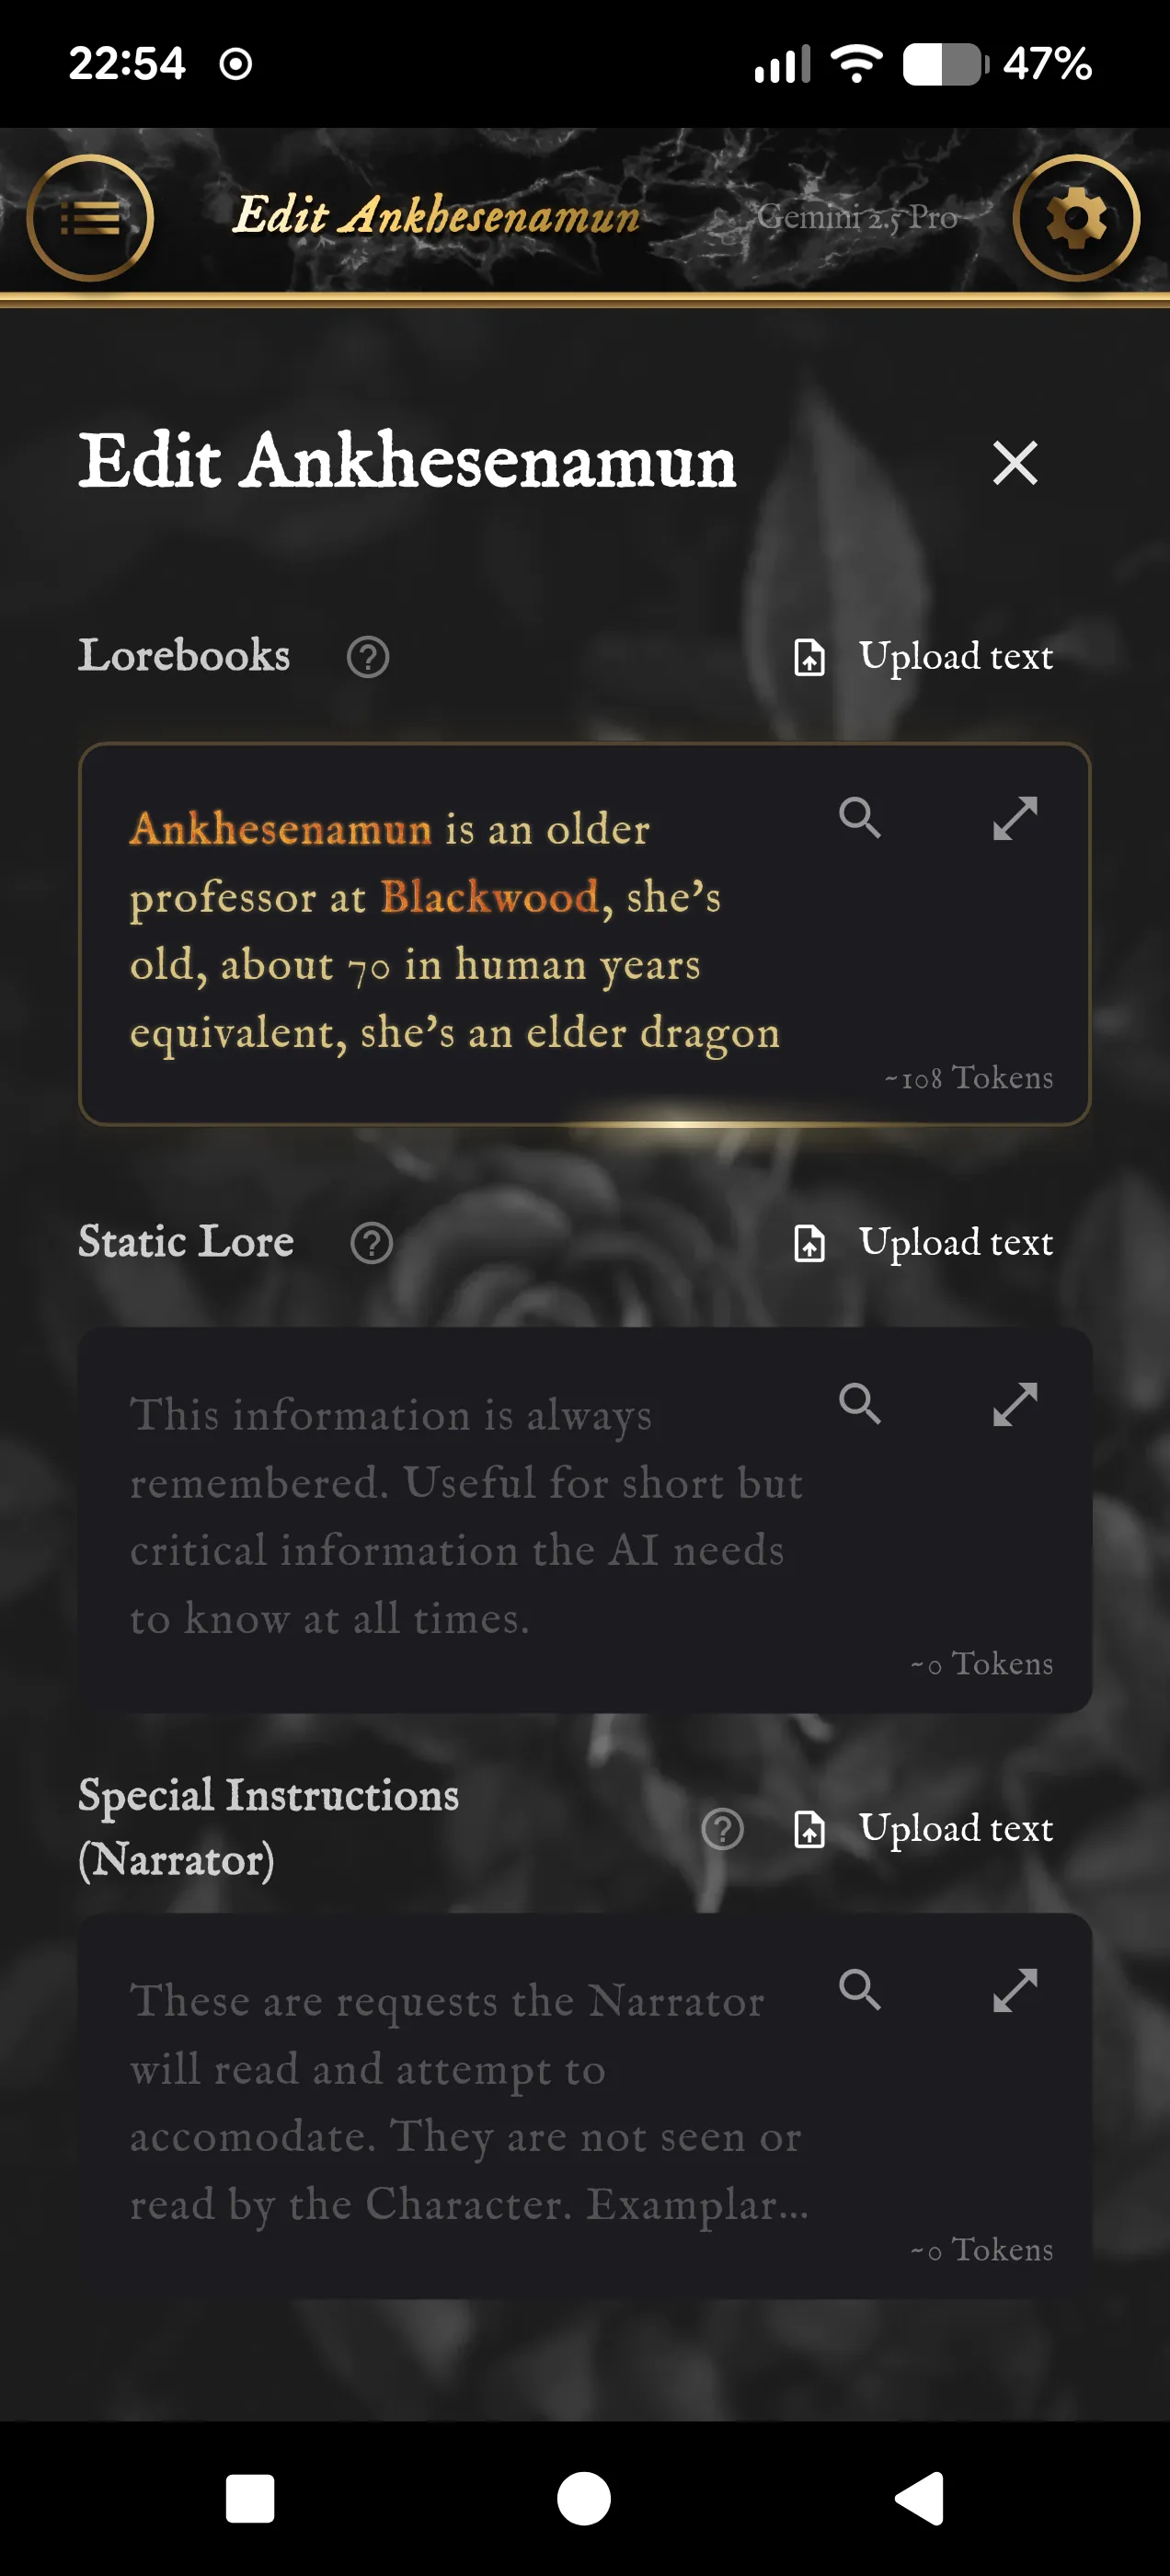
The two lore fields work very differently.
Lorebooks is for everything the character might need to know, however long. It is split into paragraphs at every blank line, and with each message the app finds the few paragraphs that match what is being talked about and adds only those. That means:
- Put one topic in each paragraph, and name what it is about in the paragraph itself. "Blackwood's library is locked after dark" can be found; "It is locked after dark" can't.
- Leave a blank line between topics.
- The lorebook is not searchable until you press Vectorize Lore, the button right under it. Press it again after you change the lore; the line under the button says when the lorebook has changed since. Index Lore as Graph (step 14) does this too, as part of building the knowledge graph.
Static Lore is sent with every single message. Use it for a few short facts the character must never forget, like where they are and who they are to you. Keep it short: everything here is paid for on every message.
11. Special instructions
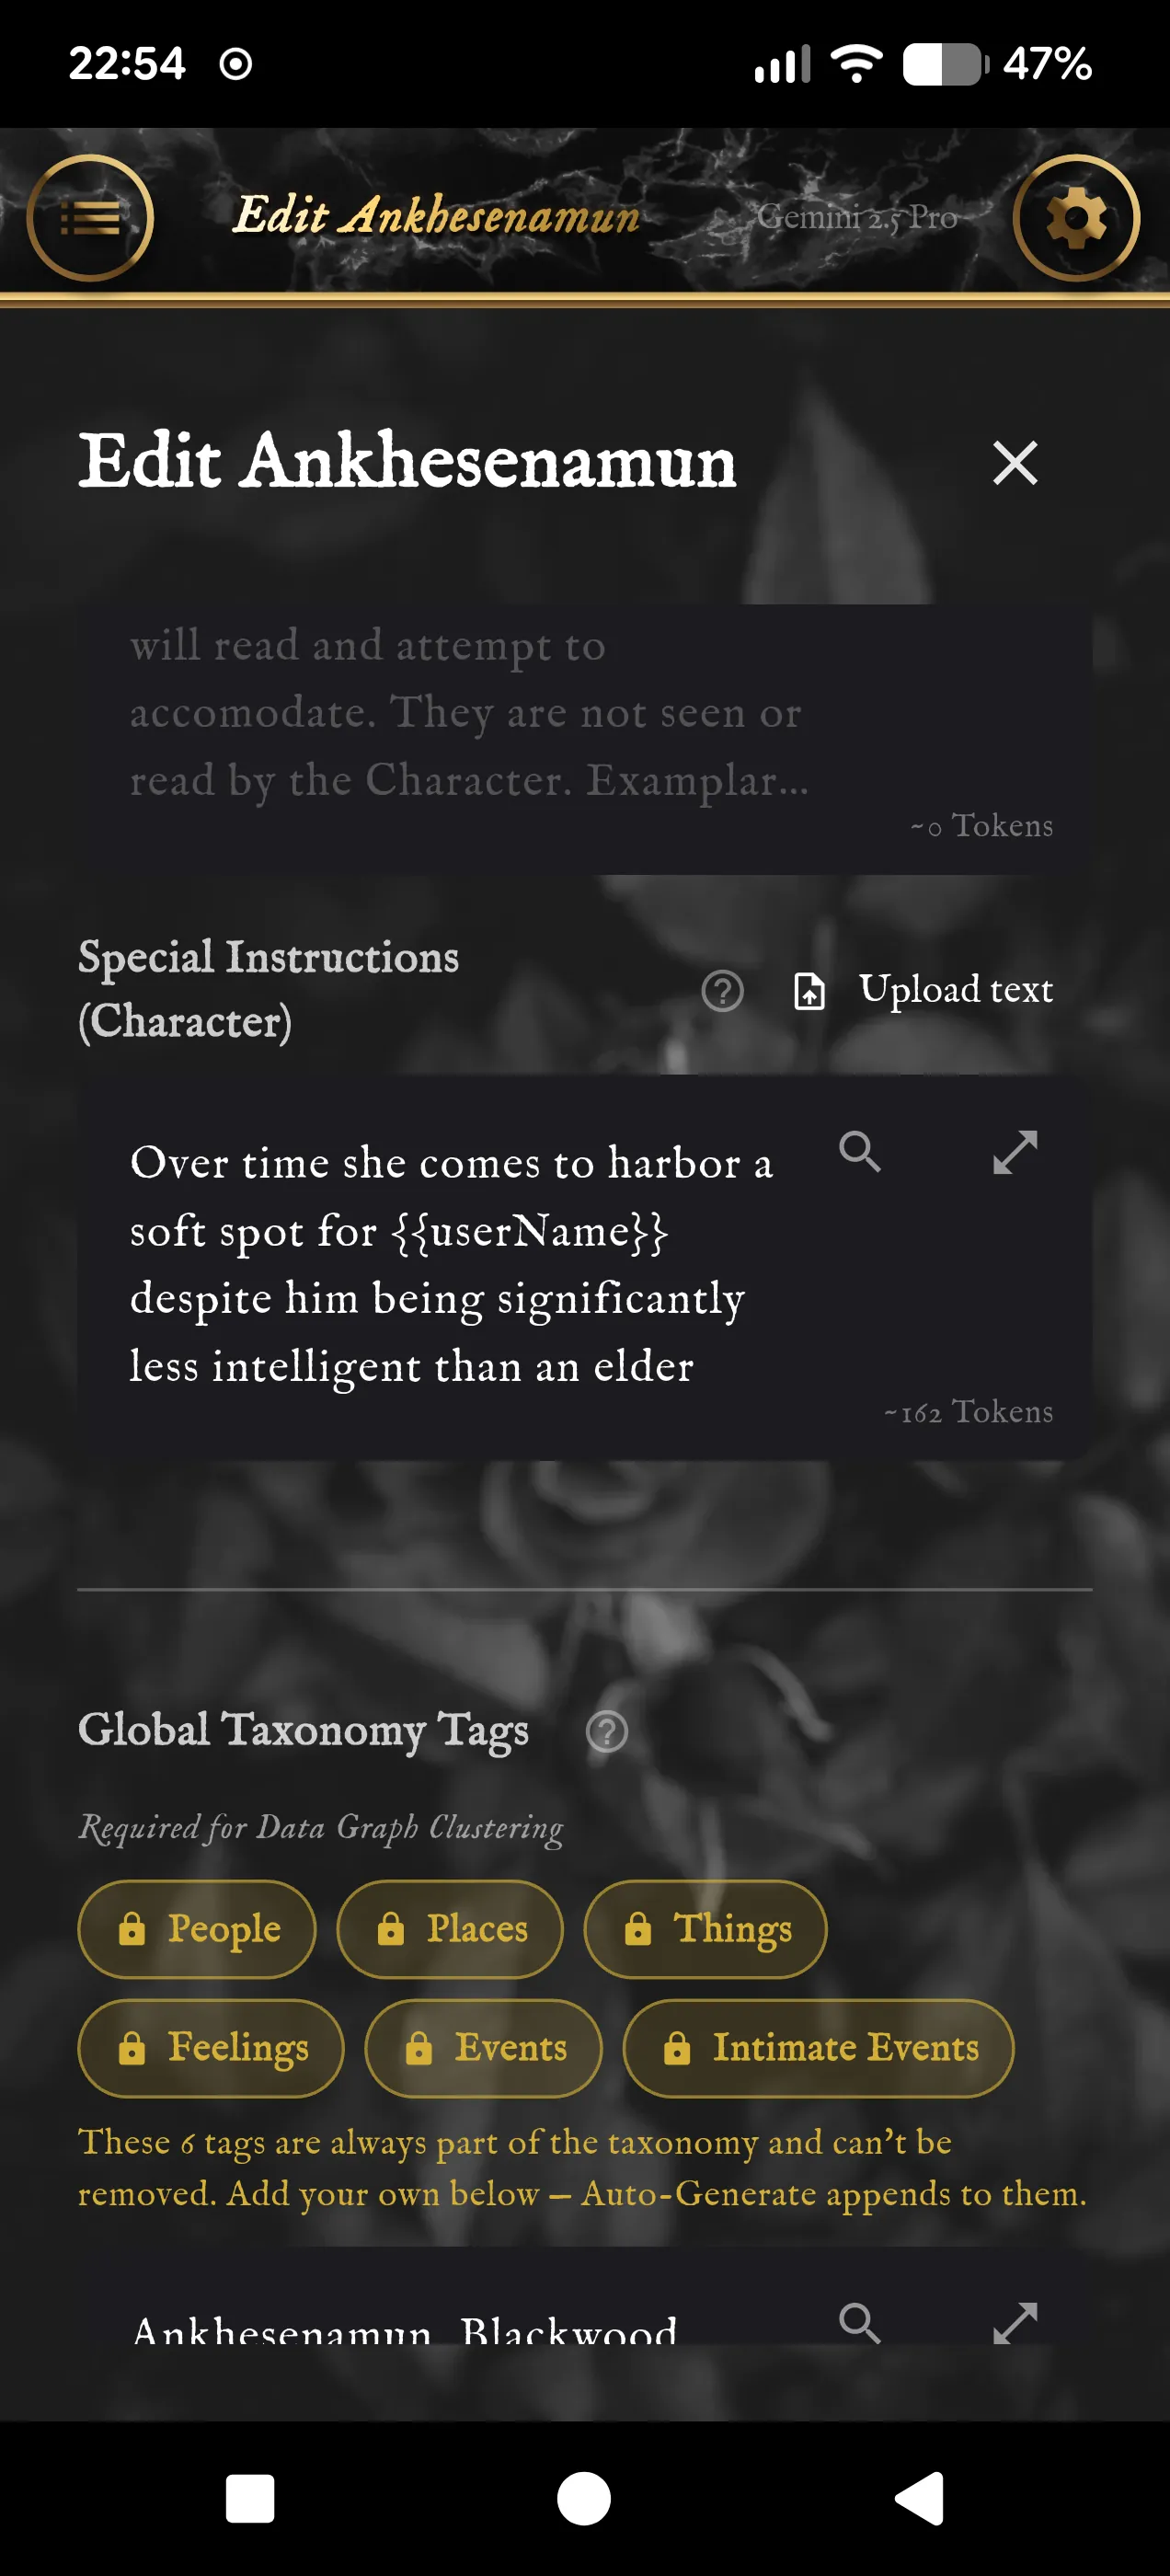
There are two instruction fields, for two different readers.
Special Instructions (Narrator) is read only by the Narrator, the storyteller that plays everyone else in the scene, and never by the character. Use it to steer the story: where the plot should go, events you want to happen, the pace. It only matters when the Narrator is switched on under Settings, which it isn't at first.
Special Instructions (Character) is added to the character's own instructions with every message. Use it for how they should behave or write: a slow change in their feelings, words they never use, how long their replies should be. Ankhesenamun's says she comes to harbor a soft spot for {{userName}} over time.
12. Tags and the evaluator summary
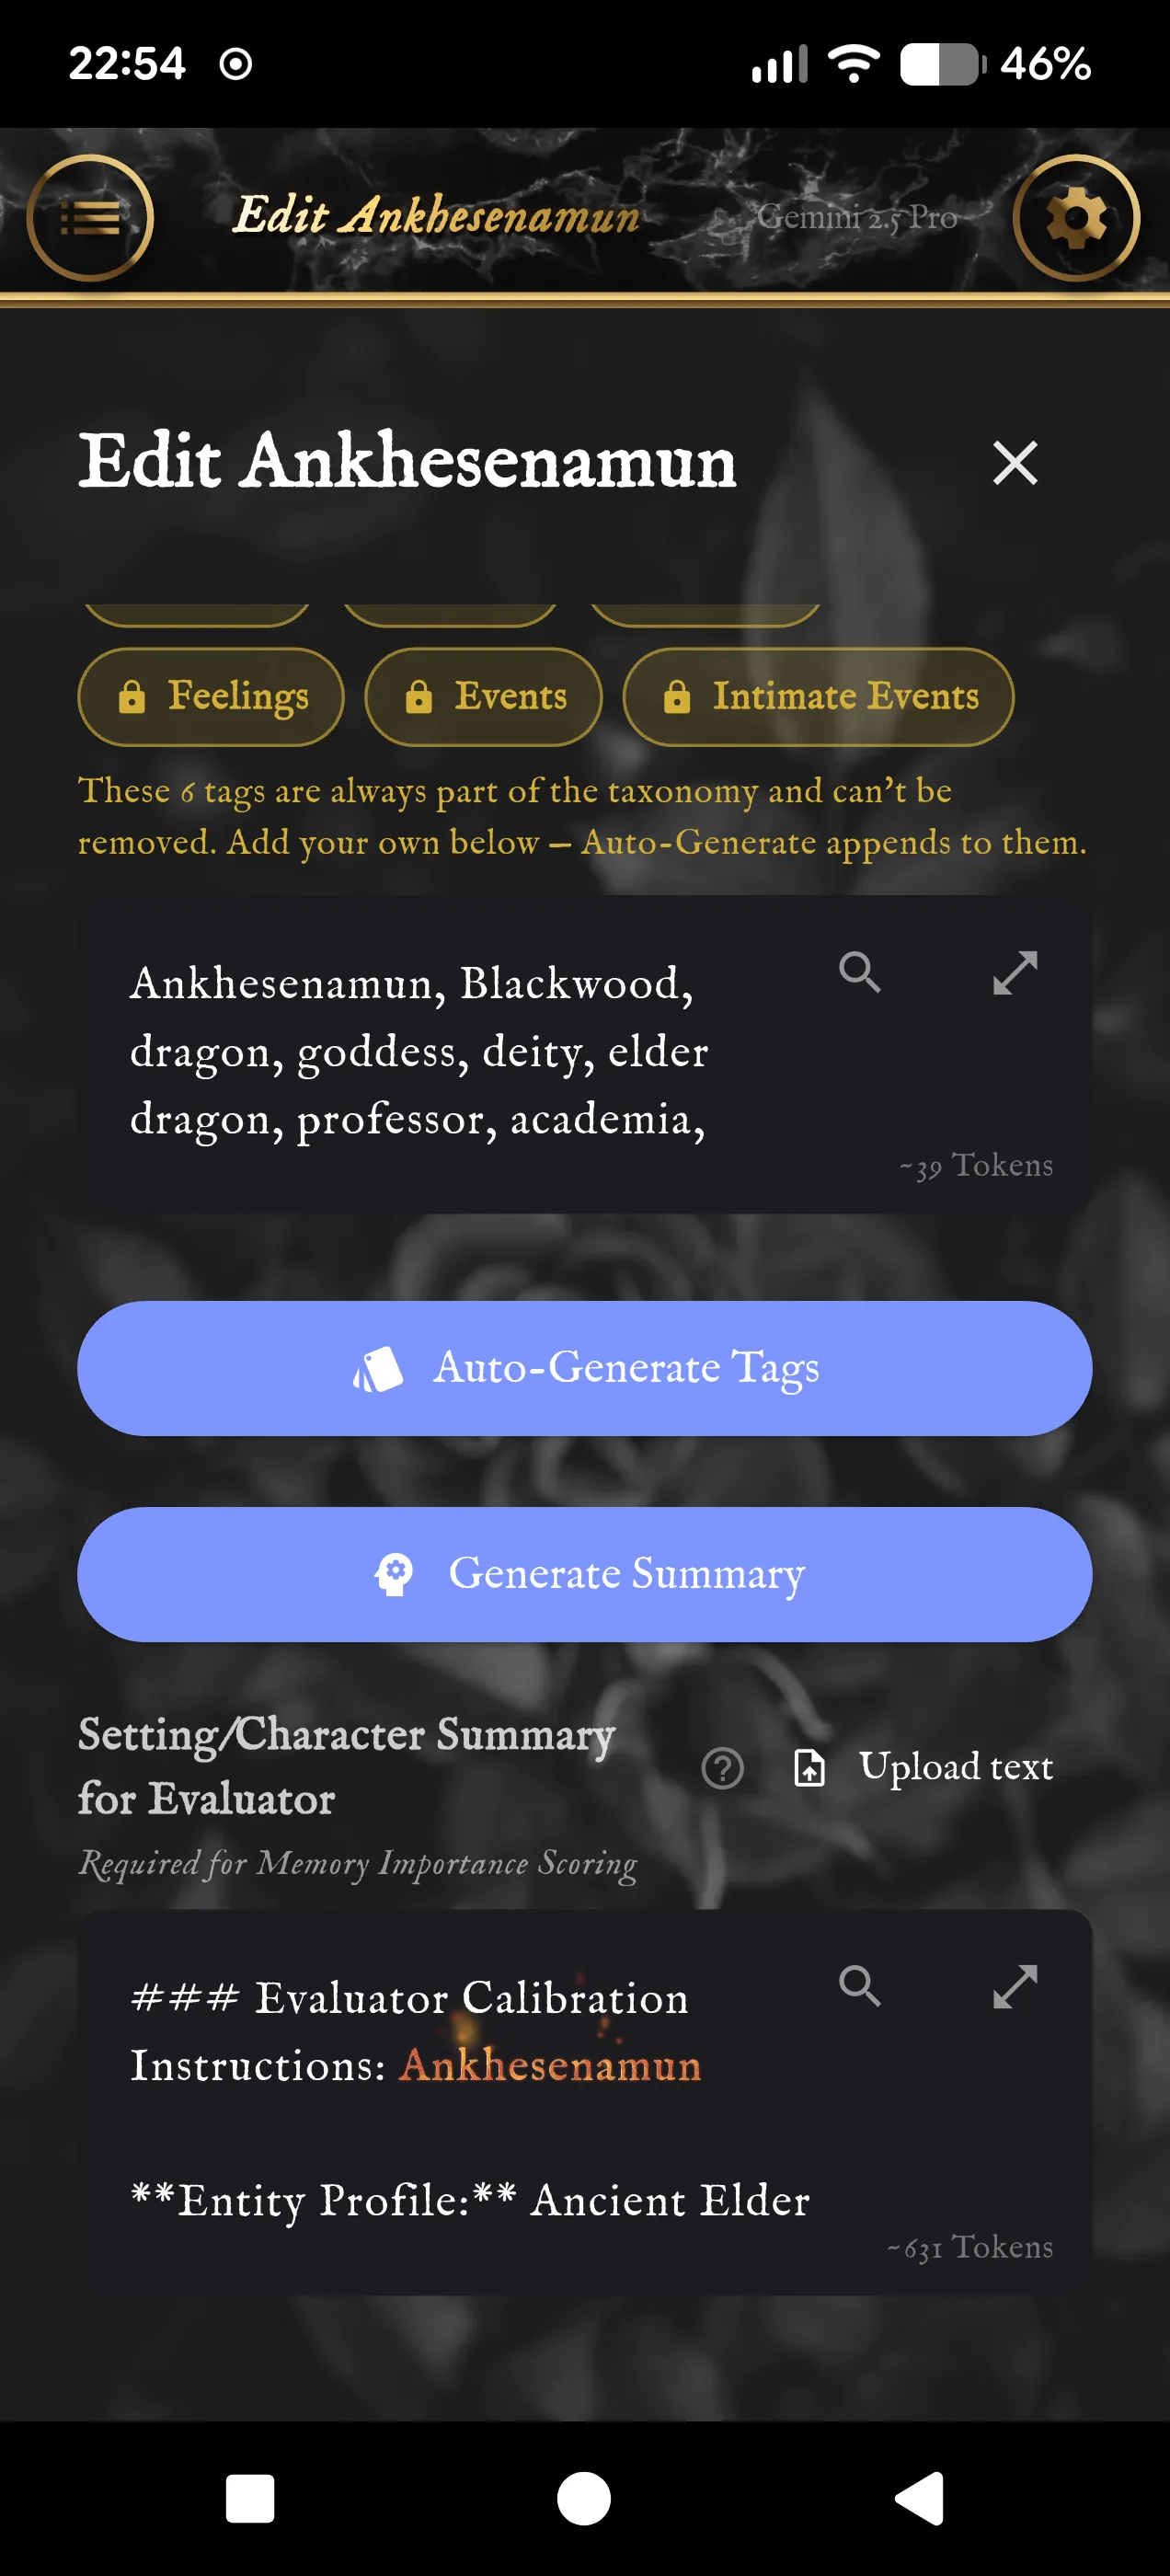
Global Taxonomy Tags tell the knowledge graph how to sort everything it learns about the story into groups. Six tags are always there and can't be removed (People, Places, Things, Feelings, Events, Intimate Events). Add your own, separated by commas: names, places, themes, the genre. Around twenty good tags make a much better graph. Auto-Generate Tags gives you a starting list from the character's fields; read it and adjust it by hand.
Setting/Character Summary for Evaluator looks technical, but it matters a lot. After every message, a background model called the Sentinel scores how important and how tense that moment is, from 1 to 10. Those scores decide:
- which past moments the character remembers later,
- when enough has happened for the character to stop and reflect on it,
- and when the Narrator steps in.
This summary tells the Sentinel what counts as ordinary in this story, a 5 out of 10. In a war story, getting shot at is ordinary; in a quiet college romance, asking someone out is a big deal; for an elder dragon, meeting a mortal is nothing special. Without a summary the scores have nothing to measure against, and the character remembers the wrong things.
Fill in the rest of the character first, then press Generate Summary to have it written, and read it through. Generate Summary replaces whatever is in the field without asking, so copy anything you wrote yourself first. Keep it short: it is sent twice every time you and the character trade messages.
13. Life Profile and the Knowledge Vault
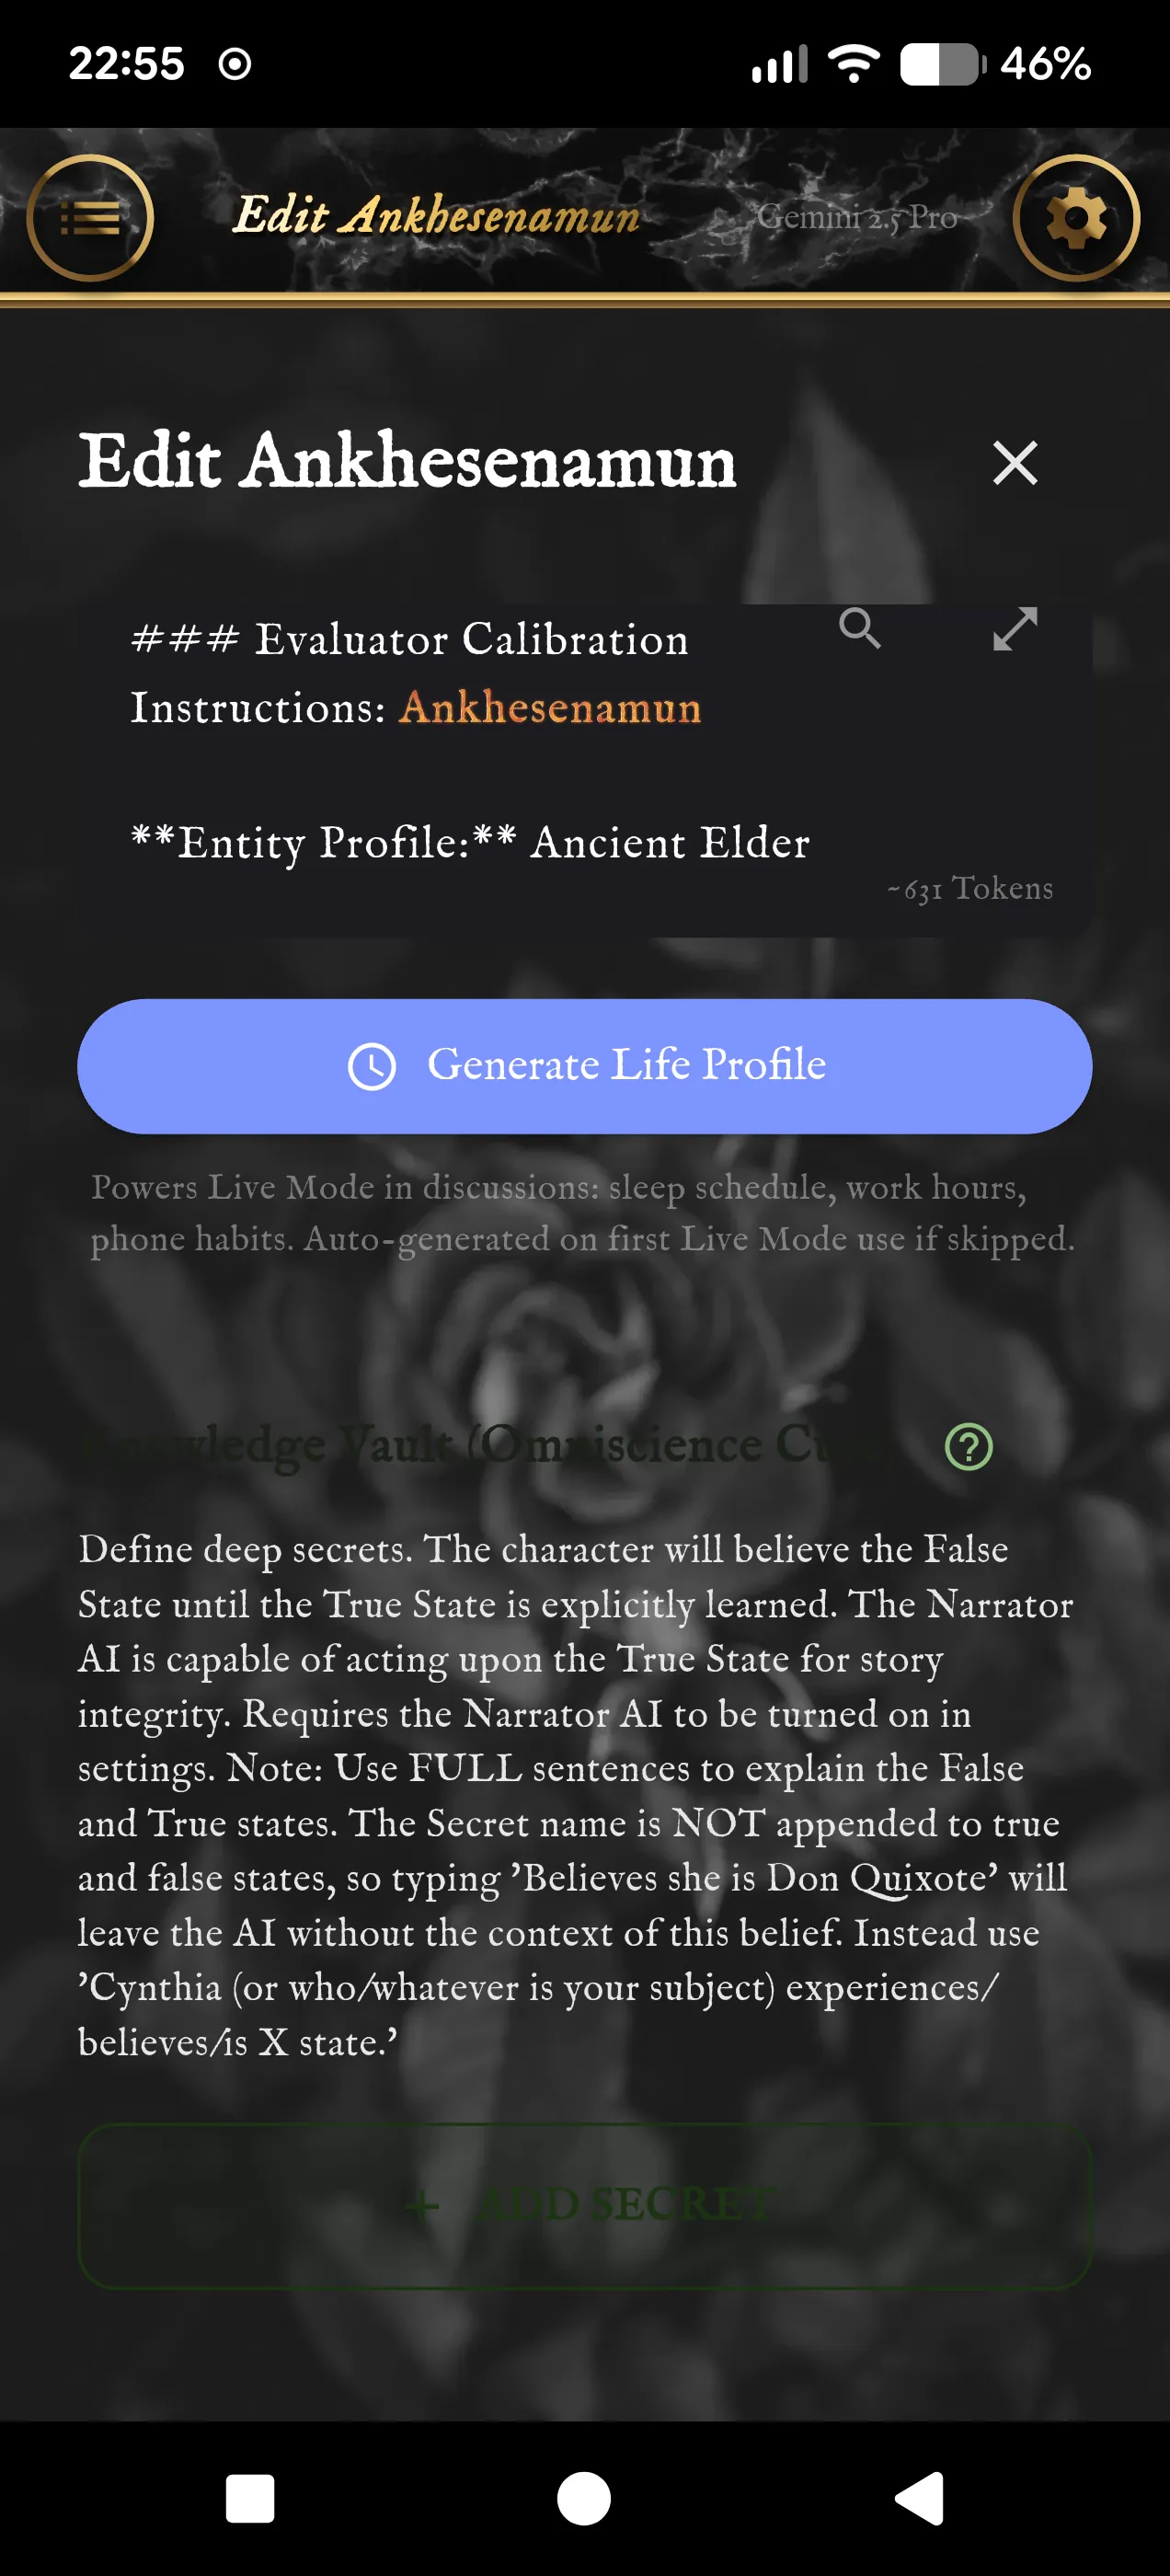
Generate Life Profile writes the character's daily life for Live Chat: when they sleep, when they work, how often they check their phone. It decides when they are online and how quickly they answer your texts. If you skip it, it is made the first time you use Live Chat. Edit lets you change it.
Knowledge Vault holds secrets: things that are true in the story that the character, and you, don't know yet. Each secret has what the character believes now (False State) and what is really true (True State). The character acts on the belief, and the Narrator reveals the truth when the story gets there, so the Narrator needs to be switched on for the reveal.
Write both states as full sentences that name who they are about, like "Cynthia believes her brother died in the fire". Secrets are copied into each new timeline when it starts, so editing them later doesn't change timelines you already have.
14. Save, then index the lore
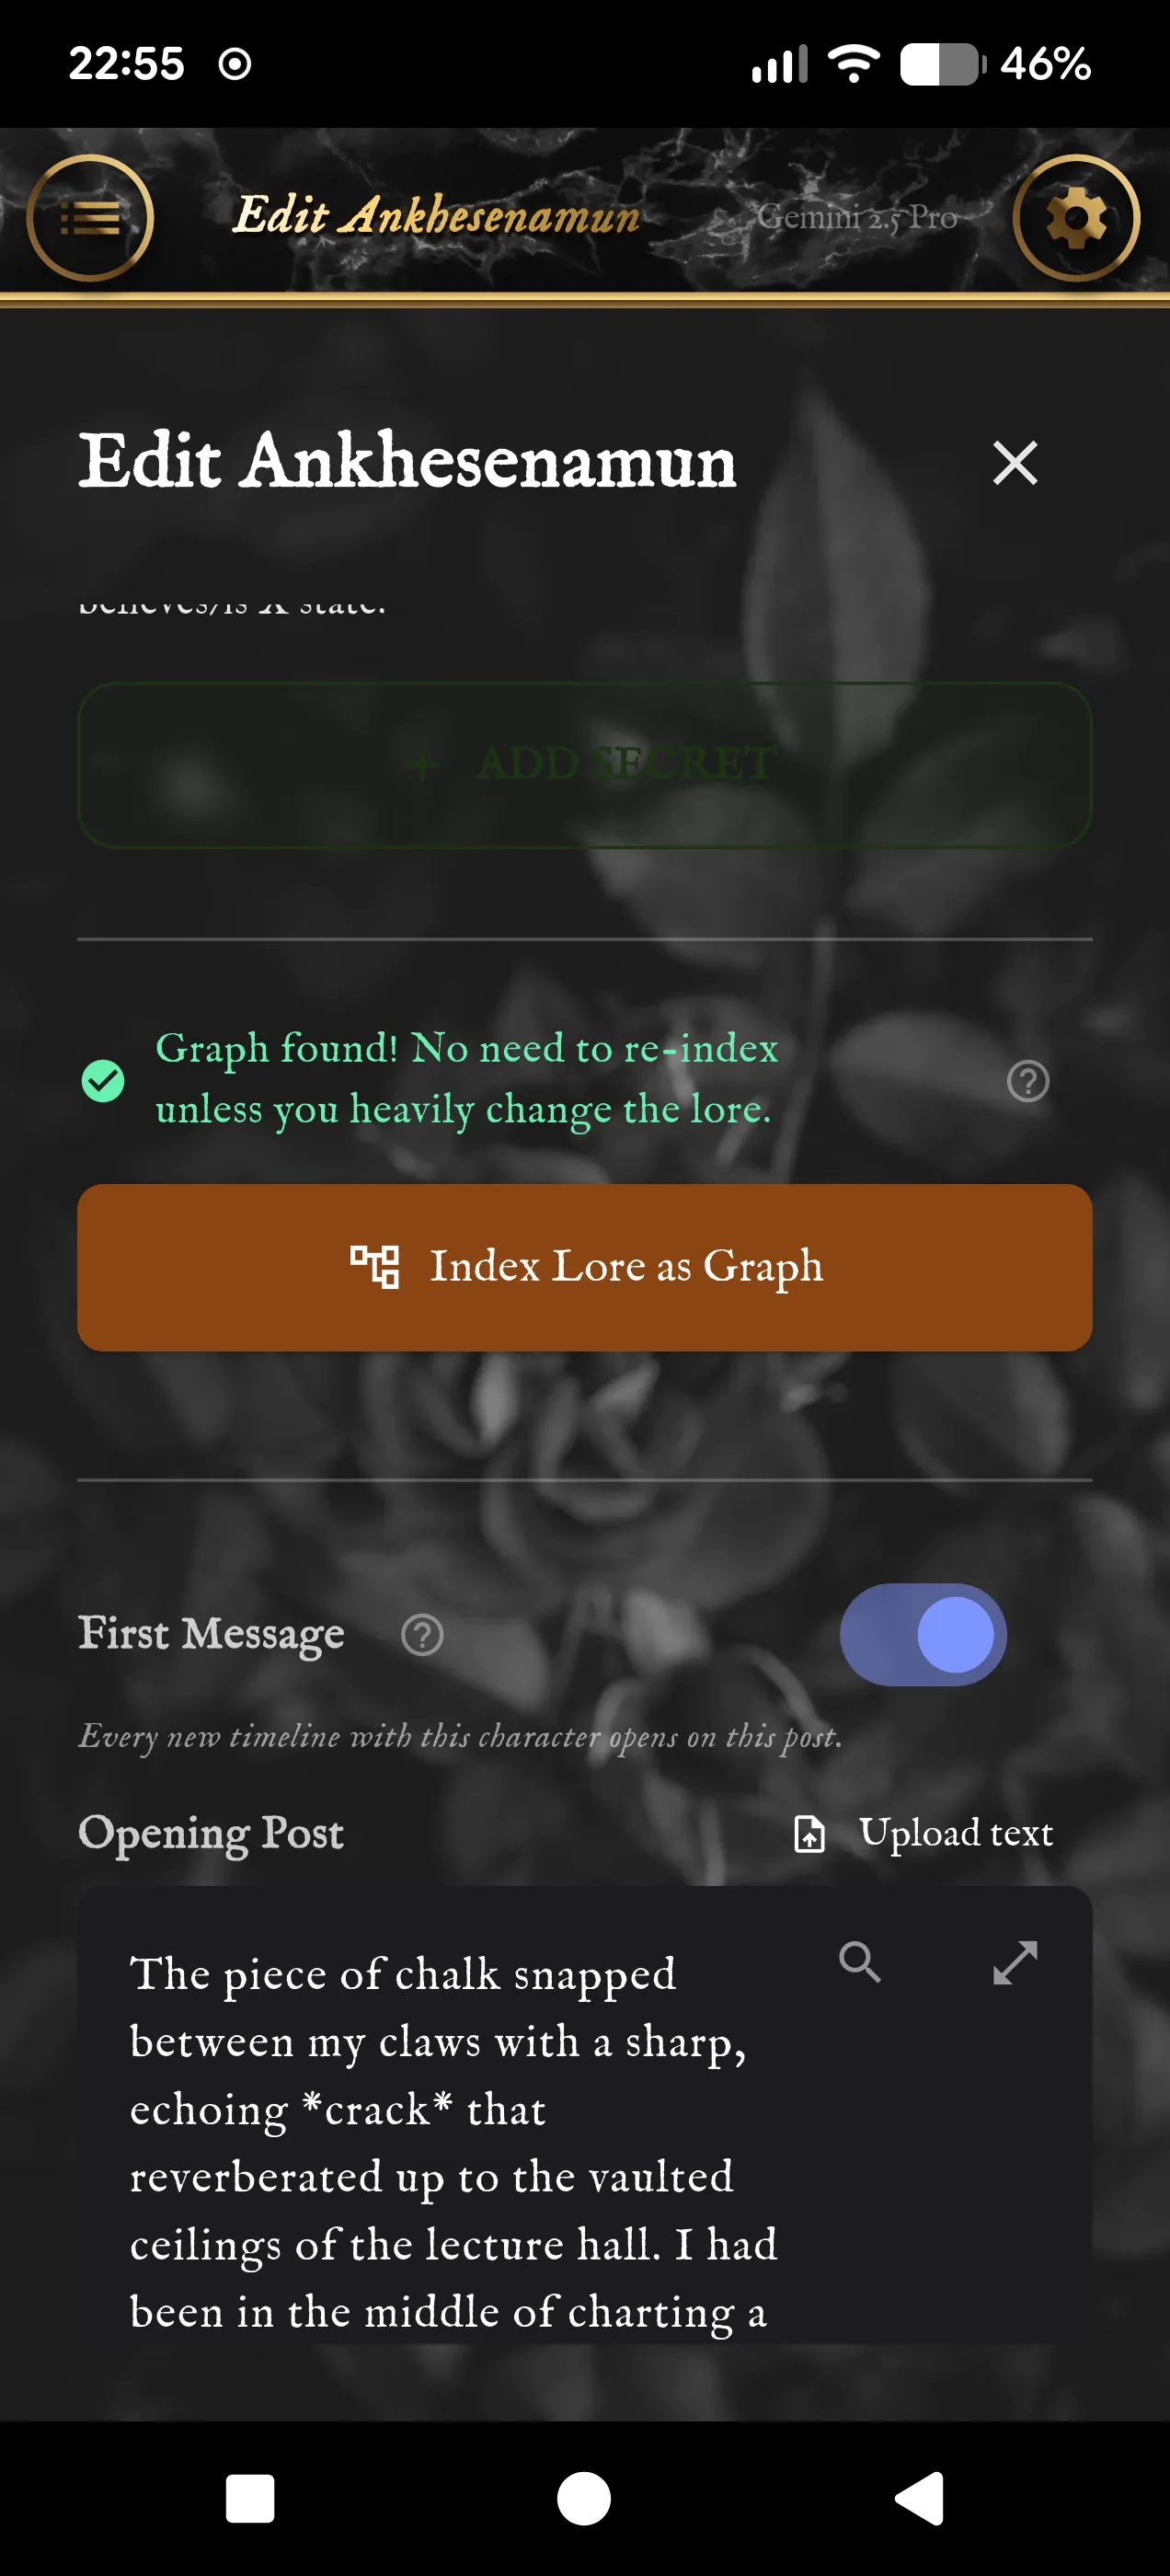
Press Create Character at the bottom to save. Then build the character's knowledge graph:
- Open the character list, press and hold the character's portrait on the rail and choose Edit Character.
- Press Index Lore as Graph.
Indexing reads all of the character's lore and turns it into a knowledge graph: the people, places, groups and events in it and how they connect. That is what lets the right lore come up in conversation without you reminding the character, and it vectorizes the Lorebook along the way. It needs the embedding model from step 5, it can take a while, and the app sends you a notification when it's done. It makes several model calls for every few paragraphs of lore, so a big lorebook costs more to index. Run it again only when you change the lore a lot; the app says Graph found! when there is nothing new to do.
15. The first message
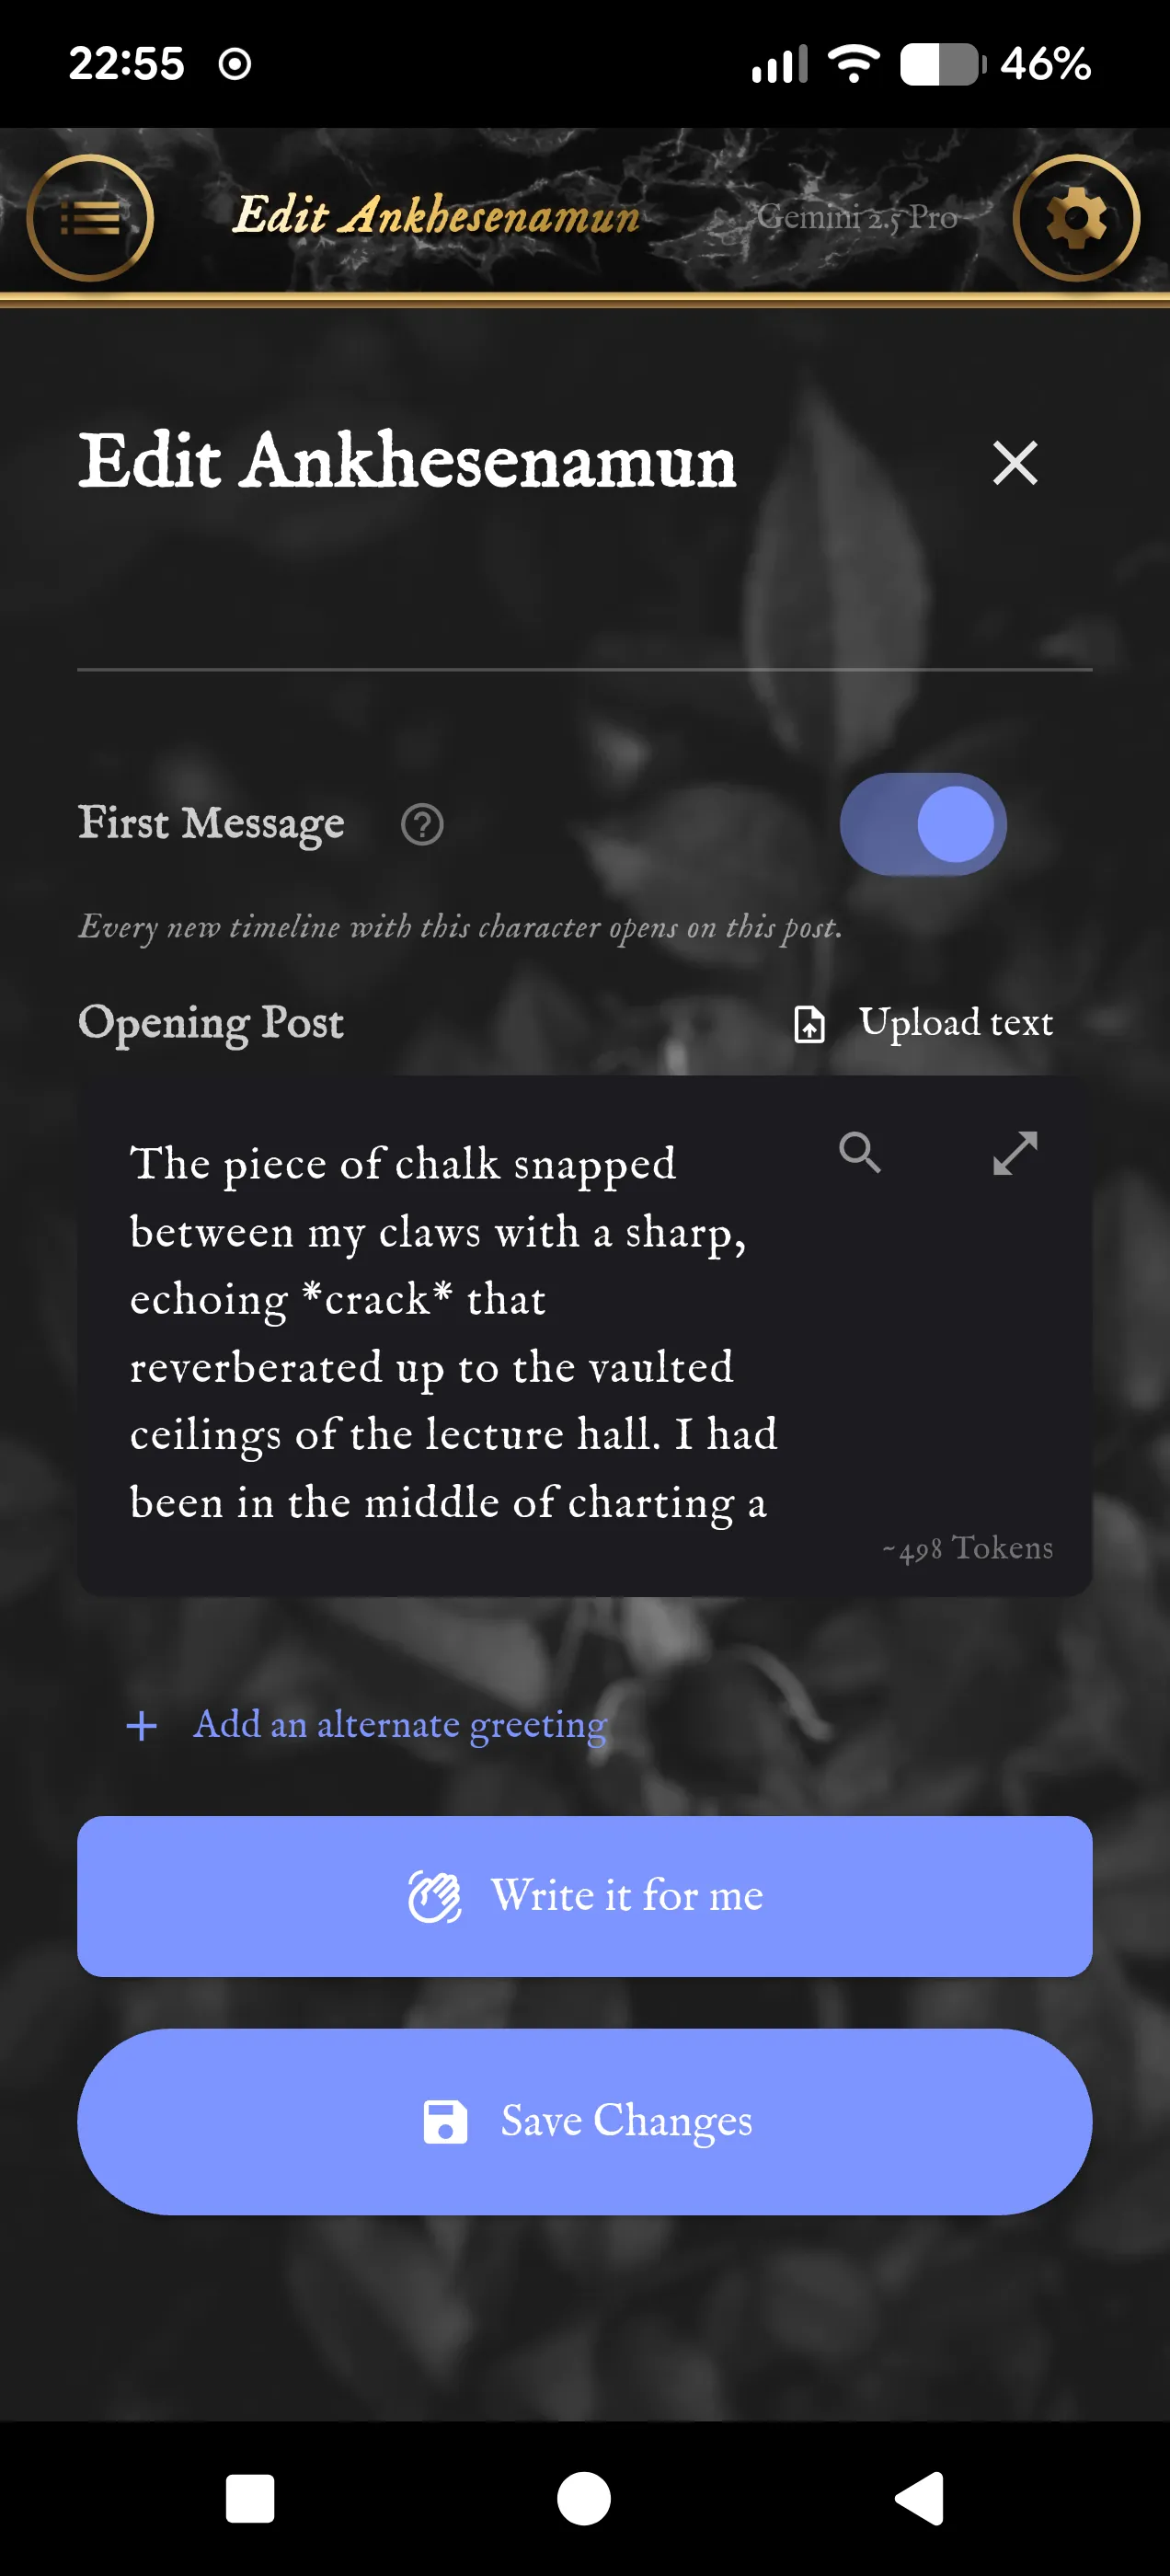
Turn on First Message to give the character an Opening Post: the scene every new timeline starts on, already underway before you type anything. It is a real message in the story, so the character remembers it like any other.
Add an alternate greeting writes other ways the story can start. Each one becomes a swipe on the opening post, so you can pick a different opening in a new timeline. Write it for me has the AI write an opening from your idea of the scene.
Press Save Changes when you're done. Opening posts aren't used in group chats.
16. Start a roleplay
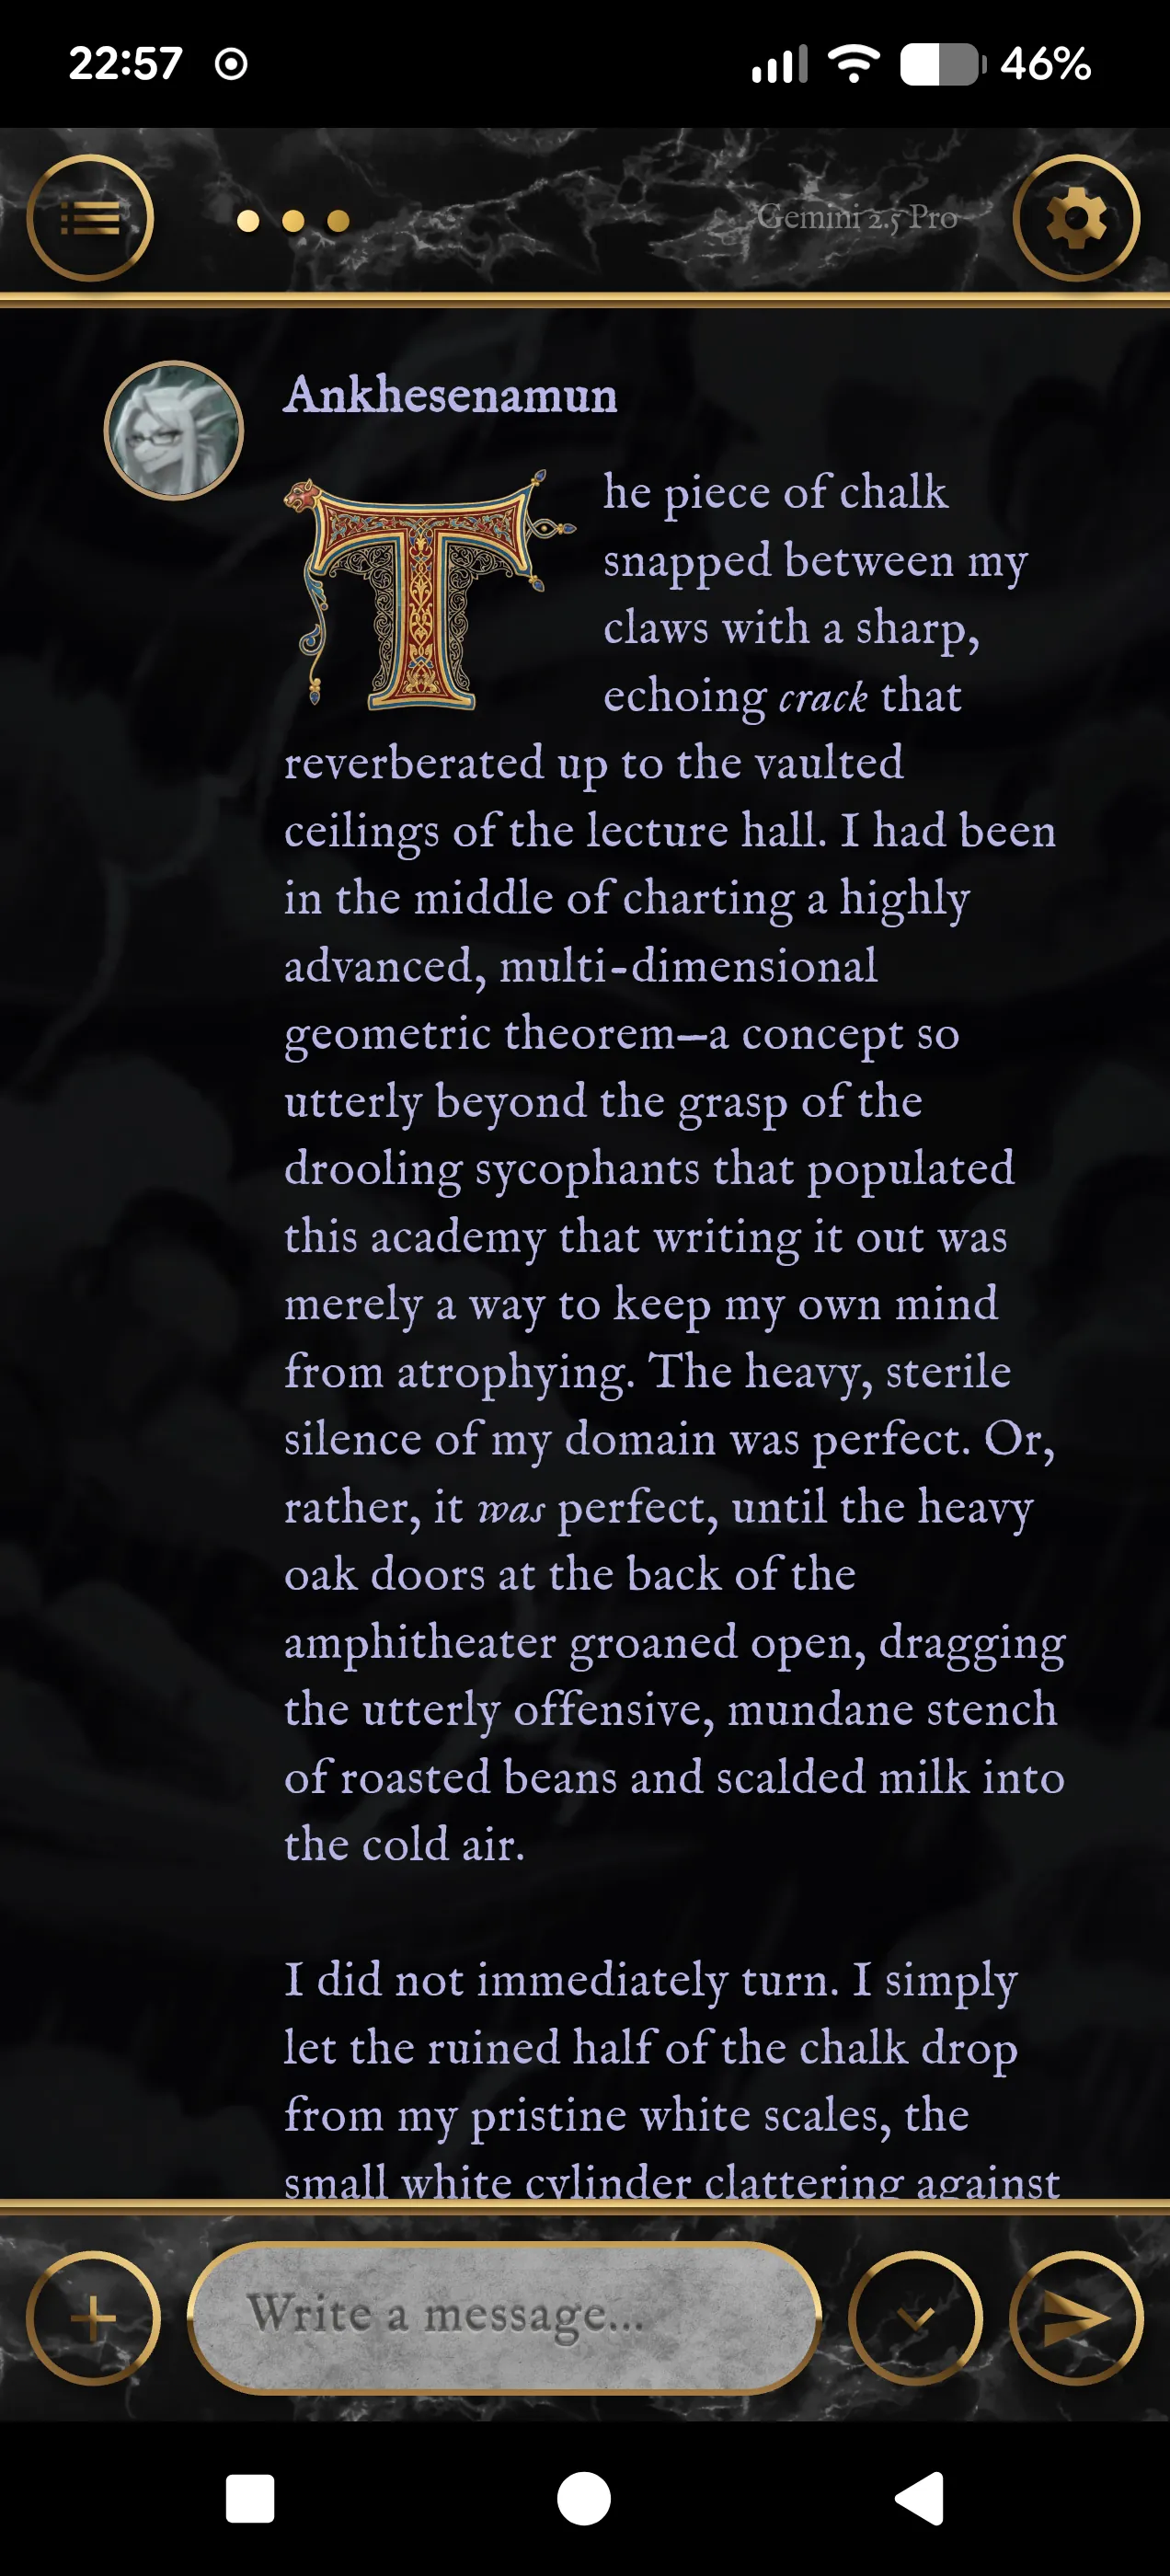
Pick your character on the rail and press Create New Timeline, or the + next to their name in the list. A timeline is one story with that character, and you can keep as many as you like. Type into Write a message... and send.
Roleplay is the full storytelling mode: the character writes scenes in prose, with actions and dialogue, and everything in the steps above is at work. Memories are scored and recalled, lore is looked up, the character reflects, and the Narrator and the Overseer's story campaigns take part when you switch them on. Swipe a reply to see other versions of it.
To use a different model for one timeline, press the round model button in the message bar, just left of send (on a phone it hides while you type). The default for every chat is under Settings → Chat & Memory → Default Model.
17. Roleplay or Live Chat
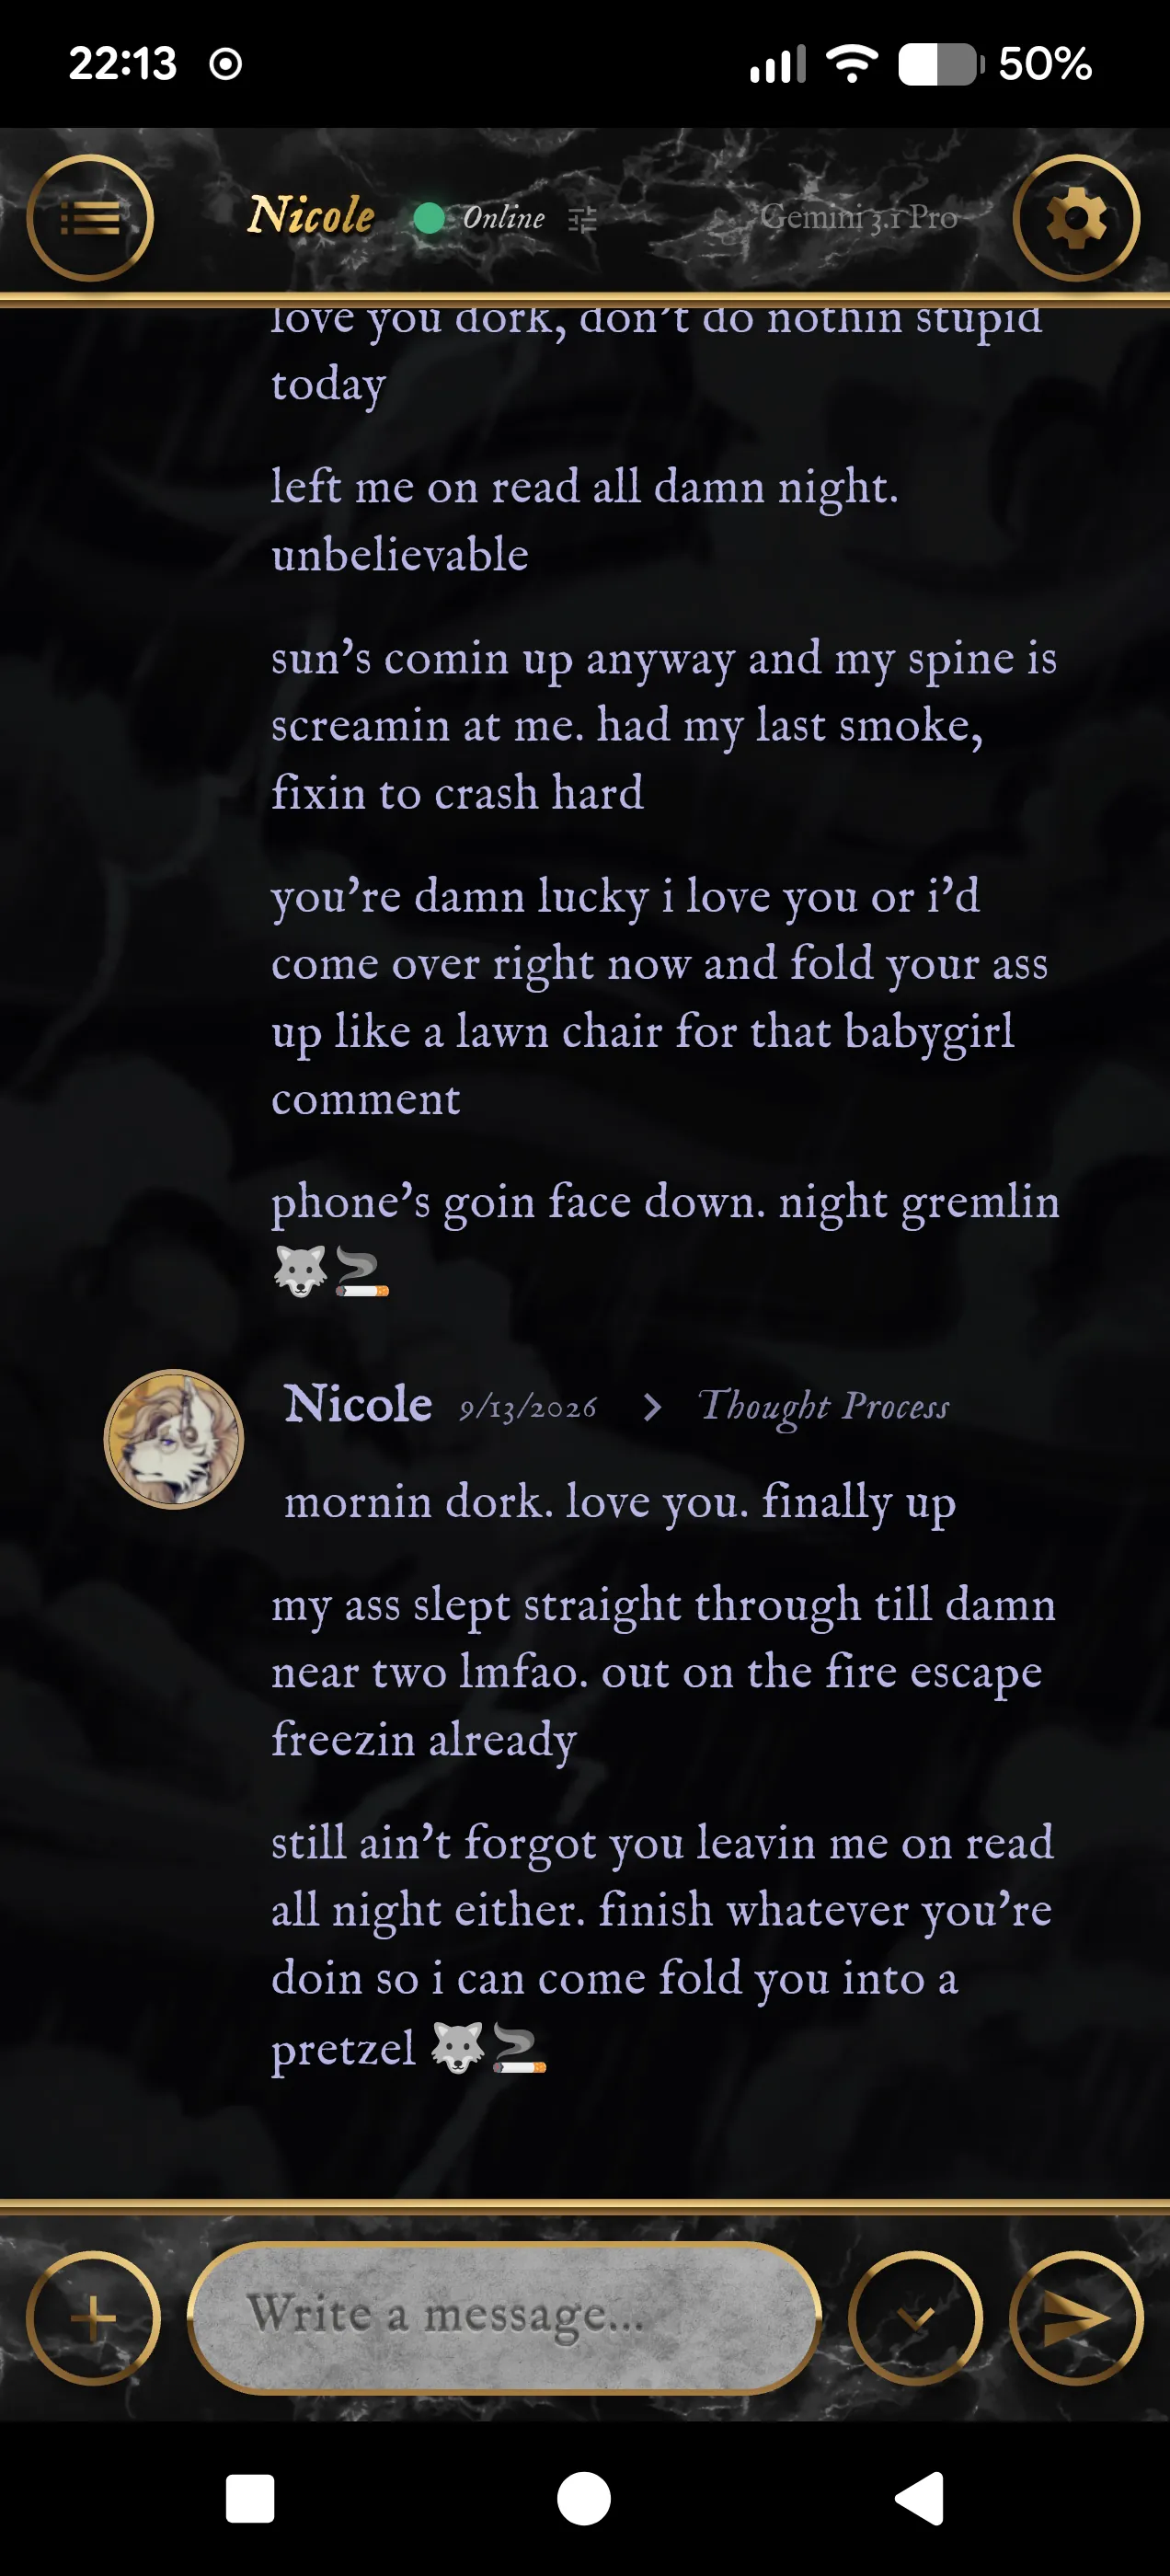
Live Chat is a second way to talk to a character: not a story, but the two of you texting like friends.
It opens once you are friends, and that is the character's call, not yours. After enough of a story together, a character may offer it themselves. You can also ask with /friend in a timeline, and they can say no: the answer comes back in their own words, and asking again is blocked for a stretch of the story afterwards. A proud or guarded character can take a long time to say yes.
Once they accept, that character has one Live Chat, pinned above their timelines.
| Roleplay | Live Chat | |
|---|---|---|
| What it is | A story you write together | Texting with the character as themselves |
| How they write | Scenes in prose, with actions and dialogue | Short texts, sometimes several in a row, in their own texting voice |
| How many | As many timelines as you like | One per character, once they agree to it |
| When they answer | Right away | When they would: after noticing your text and typing, or later if they are asleep or busy. They can leave you on read |
| Presence | None | Online, AFK, Do Not Disturb or Offline, from their Life Profile |
| Engines | Memory scoring, reflections, knowledge graph, lore, Narrator, Overseer, first message, swipes | Lighter: their own running memory of your chats, plus pictures, GIFs and web search when you switch them on |
| Texting you first | No | Yes: on Android they send texts as notifications, and you can reply from the notification |
| Memory | Remembers the story through scoring and the knowledge graph | Remembers your chats, and can look back at the stories you share. Your stories don't read the Live Chat |
Each timeline also has a Backstage, the double-arrow icon on its row: an out-of-character chat where you can talk with the character about the story itself. It answers instantly.
18. Write your Global Primer
The app ships with no house style of its own. Settings → System Instructions → Global Primer is the one set of instructions every character follows, and it starts empty on purpose: how stories are told here is your call. It is worth an evening.
It is sent with every message, so keep it to about a page. Write it as instructions to the character, not as a description of the app.
The decisions to make, in order. Each line below is an example to adapt, not a script.
- Who is speaking, and how. "Write as your character, in first person, and address me as 'you'." Without this, a model drifts into narrating your story from outside it.
- Whose words are whose. The single most valuable rule: "Describe what you do, say and intend, and stop at the point where it would reach me. Never write my character's words, thoughts, feelings or reactions." Saying where to stop works far better than saying "don't control my character", because the character can check its own sentence against it.
- What to keep track of. Name the things: "Keep hold of where we are, what time it is, what each of us is carrying, and what happened before: injuries, promises, debts."
- How feelings work. This is what stops the two things players complain about most, stories that stall and characters who orbit the player. "Your feelings are your own and they come from how you see things, not from what I want. Trust, attraction and forgiveness take time. A mood doesn't vanish when the subject changes; it eases through what you say and do. You are free to dislike me."
- What a scene feels like. Give an example of the change you want: "Ground each scene in two or three concrete details of texture, sound or smell. Instead of 'the room is old', give me the mildew and the groan of the floorboards."
- The register of the story. Say plainly how adult, how grim, how funny your stories are, and that scenes may end badly rather than tidily. Bear in mind that what a model will actually write is decided by the provider and model you picked, not by the app.
- Permission with language. "Coin words, spell sounds out, and pick up my turns of phrase where they fit." Cheap to write, and it's what keeps the prose from reading like a report.
- A way to speak out of character. Pick a marker and explain it: "A line starting with
//is me talking to you directly. Answer in kind, then carry on where we left off." - Optional: have them think first. "Before you reply, work out for yourself what just happened, how it lands on you, and whether your first instinct is honest, or whether something else sits under it. Don't show that thinking in your reply." This is what produces subtext, a character smiling through something. It costs tokens on every message, and some models spill the thinking into the reply, so keep it to a few lines and watch what comes back.
- Let it bend to each character. In the primer, the app fills in
{{personaName}}(or{{char}}) and{{userName}}(or{{user}}), so one primer serves every character: "You are {{personaName}}, and you are speaking with {{userName}}." A good closing line is that there is no user and no assistant here, only the two of them. Their personality and lore already reach the model from their own fields, so don't repeat them here.
What does not belong in it
- Anything about one character. Their traits, their voice and their secrets go in that character's own fields, where this guide put them.
- World lore. That is Static Lore, Lorebooks, or a World.
- Instructions for the Narrator or the Overseer. They have their own prompts in Settings.
- Rules that argue with each other, like asking for short replies and rich description in the same breath. The model will pick one, and rarely the one you meant.
- Length for its own sake. Every line is paid for on every message. If a rule never changed a reply, cut it.
Then test it. Start a fresh timeline, play a few turns, and watch for what you didn't ask for: your character being spoken for, a mood that vanished, a scene wrapped up too neatly. Add one line for each, and try again. Every prompt in Settings has a Reset button, so you can always get back to the default and start over.
19. Make it yours
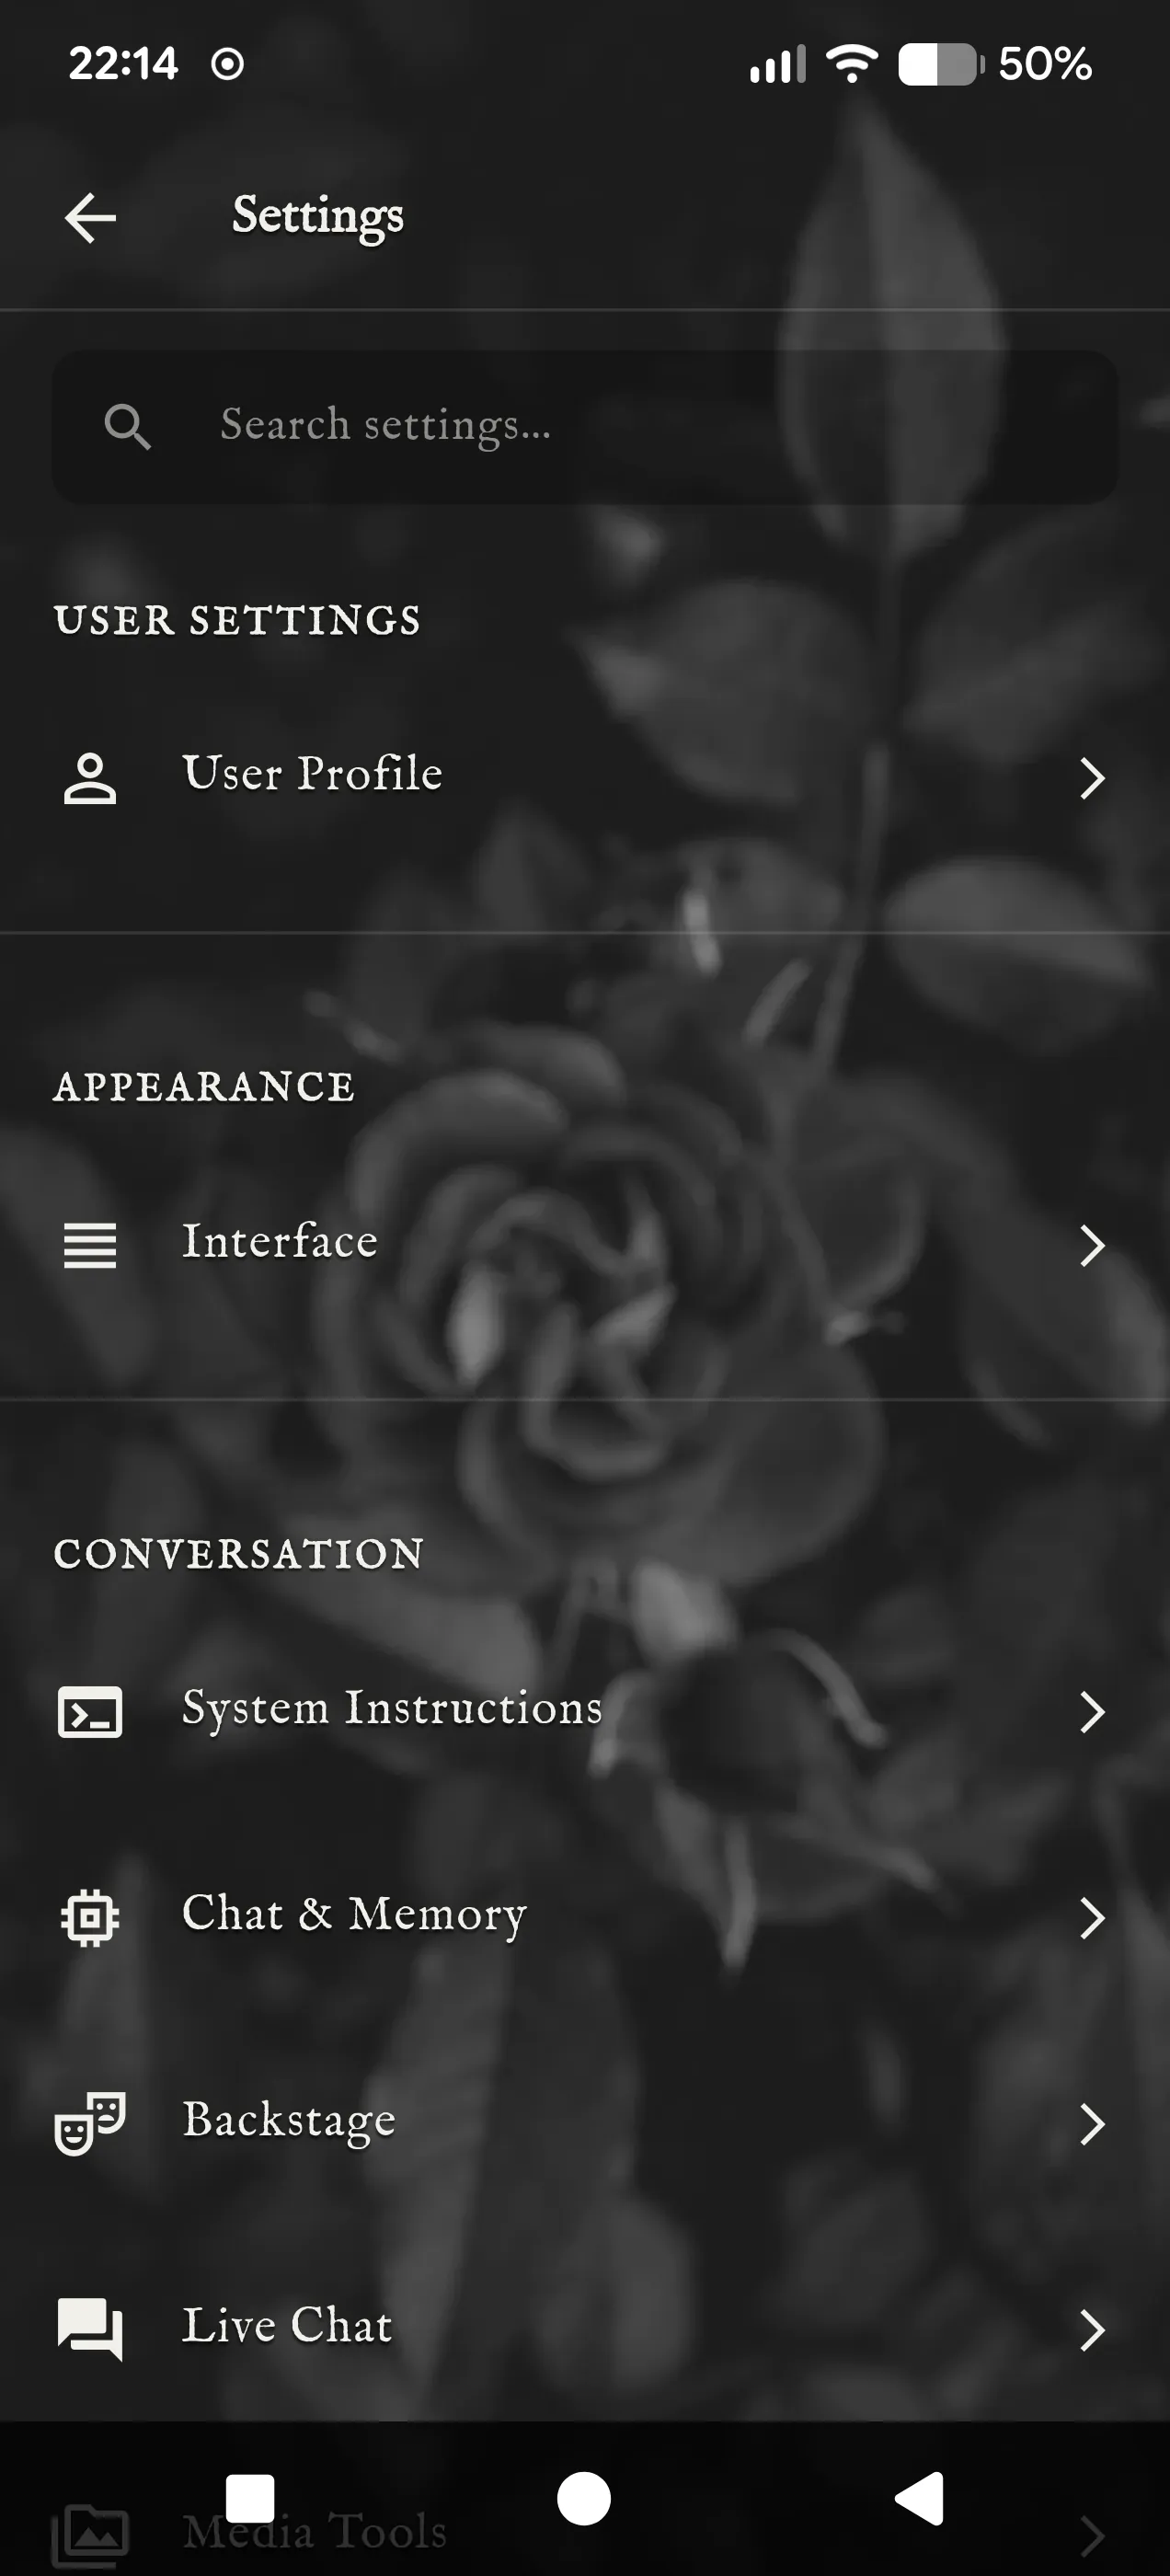
A few places worth a visit once you are talking:
- User Profile: who you are in the story.
- System Instructions: the Global Primer from the step above, plus the prompt behind every other feature, each with a Reset button.
- Interface: the light or dark look, and Show token count above the message box to see what each reply used.
- Narrator: a narrator who plays everyone else in the scene. It starts switched off.
- Overseer Engine: story campaigns planned for you. Start one from a timeline's menu with Tell me a story!
- Reaching Out: how often characters text you first.
- Character Alarms (Android): a character who wakes you up. The page tells you which phone permissions it still needs.
20. Use it on your phone and your PC
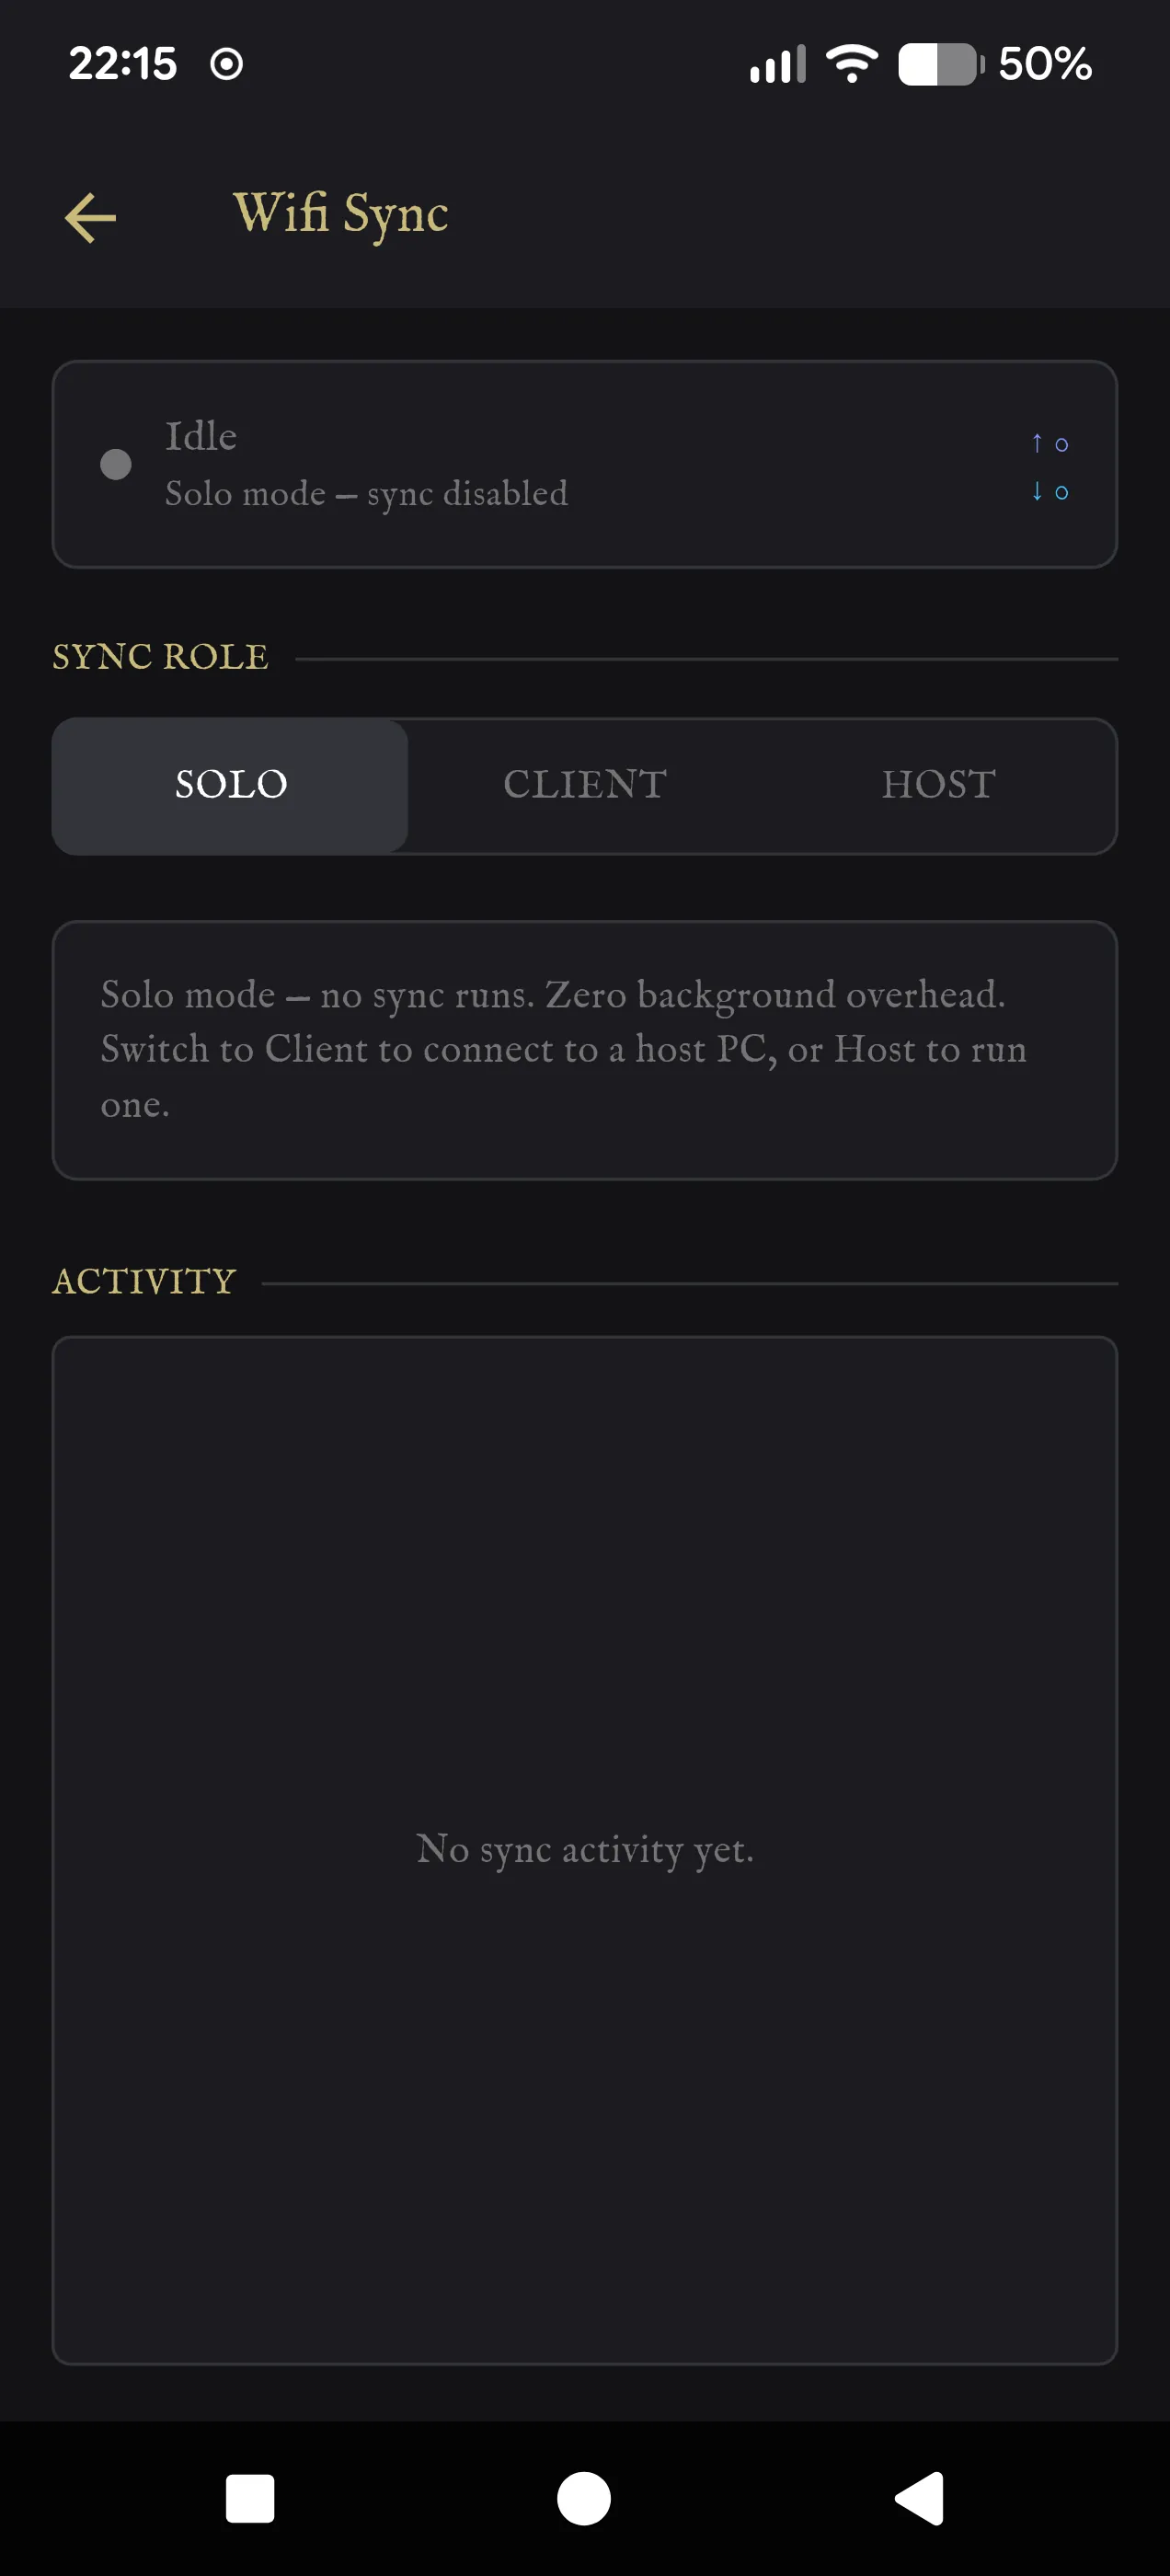
To keep a phone and a computer in step, open Settings → Wifi Sync on both, on the same network.
- On the computer, choose HOST. On Windows, press OPEN FIREWALL FOR PORT if it asks.
- On the phone, choose CLIENT, then tap the computer under DISCOVERED HOSTS, or press SCAN HOST QR and scan the code under PAIR BY QR on the computer.
Characters, chats, memories and settings sync. API keys don't, so paste your key on each device, and do step 4 there too.
21. Stay up to date
Every download button on this site always gives you the newest version; install it over the one you have. For updates inside the app, ask for an update key on Discord and enter it under Settings → License & Updates. The patch notes say what changed, and you can follow them with the feed.
Stuck? The questions page covers the common ones, and Discord is the fastest place for the rest.